Yes technically once you pull your camera out of the box it is ready to Rock and Roll. But there are a lot of things hidden in the menu that you can change very quickly to make sure that from the moment you take your first shot it’s is the best capture it can be in terms of camera settings. Also some settings are to make taking photo’s easier and to also show you were key items are located.
The following screen shots are off the Canon 5D Mark III. Please refer to your camera manual to find where these settings are located in your make and model camera. All digital cameras will have the option to change the files to RAW. Which is the most essential one, but some of the others may or may not be available or they are hidden in different locations. Most of the time they will be there you just got to hunt around for them.
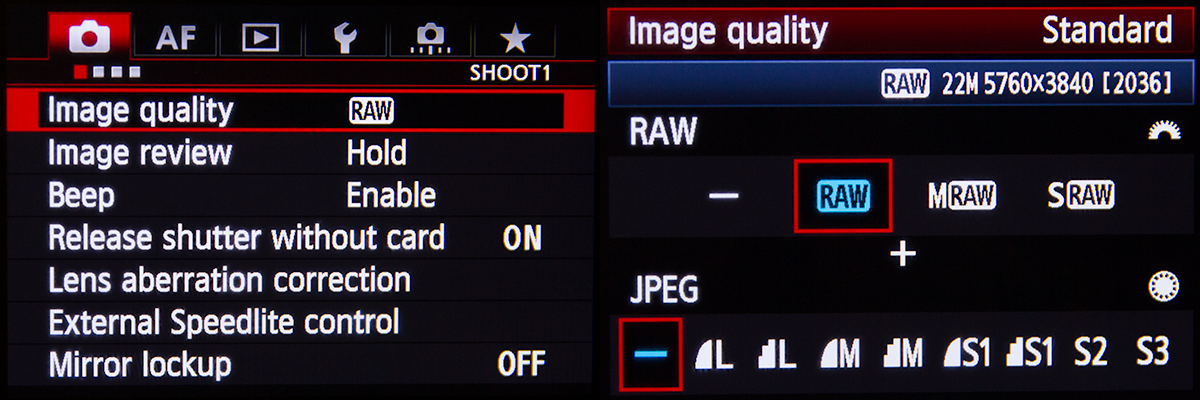
Shoot RAW
Your camera can record images in two file types. RAW and Jpeg. Think of a RAW file as your roll of film and the Jpeg as the image that is printed. Your RAW file is your master capture nothing is deleted from it. Your Jpeg file is a format that has already been partially processed by your camera and info has been deleted from it especially file size and resolution. You can choose RAW + Jpeg. Don’t just have Jpeg.
Nikon will refer to RAW as a NEF file.
For the Nikon D810 this function can be found in Shooting Menu (Picture of the camera) > Image Quality.
For the Sony AR7 II this function can be found in Shooting Menu > 1 > Quality.
LCD Brightness
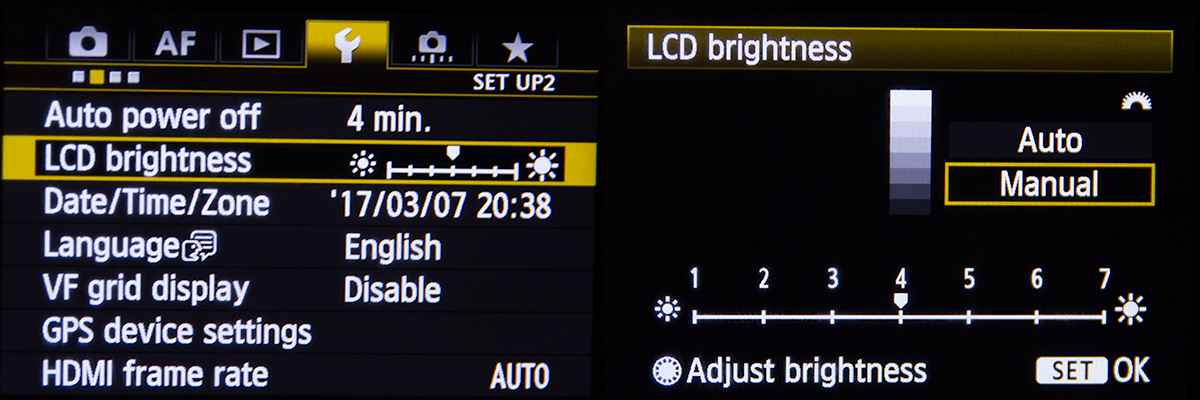
If I could change only two camera settings for any beginner the first would be setting their camera to shoot RAW files and the second would be to set their LCD Brightness. Now I can’t remember if your camera will come factory set in the correct position, but if it does then this point will explain as to why you shouldn’t touch it, even when your tempted to.
The main reason why you should keep your LCD Brightness set in the middle is this the closest representation of what your image looks like correctly exposed. (the true indicator of a correctly exposed is using the histogram but that is for more advanced shooters). With the digital cameras that are available now the screen resolution is amazing and photographers tend to go off what they see on the screen to determine if their photo looks good in terms of exposure. Now imagine if you set your camera brightness lighter or darker to suit the conditions your shooting in ie super bright day with heaps of glare and in order to see your image correctly you go to the LCD brightness and make the screen darker. From there you now continue to shoot using your LCD as your guide for correct exposure. Guess what when you get home all your images will be over exposed. Why… well you made your screen darker possibly by one or two stops. (“What is a Stop” article) so in order for the shot to look correctly exposed again you have over adjusted your exposure unknowingly.
For the Nikon D810 this function can be found in Set Up Menu > Monitor Brightness.
For the Sony AR7 II, I don’t believe you have an option for this adjustment.
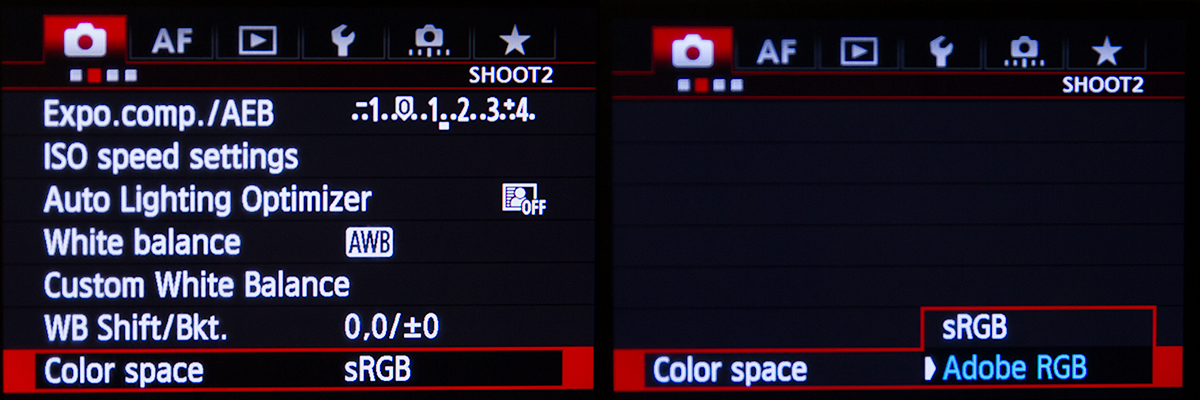
Colour Space
When you shoot RAW the colour space setting in your camera means nothing as the RAW capture is exactly that RAW, this only effects a Jpeg image. You have two options sRGB and Adobe RGB, of the two Adobe is your largest colour space and this is what you should have selected, because it is always best to have your file in the best quality as you can, you can always make your file sRGB later but you can never make your sRGB file Adobe RGB.
Did you know that if your shooting RAW and have your camera set to shoot Black and White images that when you view your images they will look black and white but when you get home all the files will be in colour. The reason why you saw it in Black and White in your camera is because your camera can’t display the RAW file so it gives you a Jpeg preview. If you shot RAW + Jpeg then when you view the files the RAW is colour and the Jpeg will be Black and White.
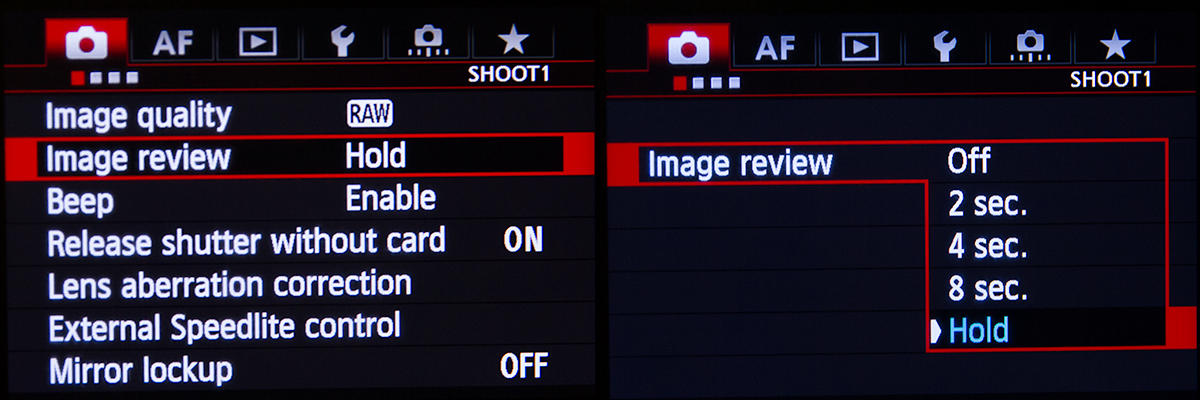
Review Time
Review Time is the amount of time your camera displays the photo on your screen before it turns it off. I always have my camera on Hold. This means that the image will only turn off when I take another photo or half depress the shutter button. The reason why I have my camera on “hold” is when your doing landscapes I like to have a good look at my images after I take them, I check to see if the shot looks straight, how the water movement is looking, how the composition looks, are there any distracting objects in the image, how is my exposure looking, what does the histogram look like. Taking all this in on a 2 second preview is almost impossible. Sure you can hit the preview button after it turns off but trust me this gets to be a pain.
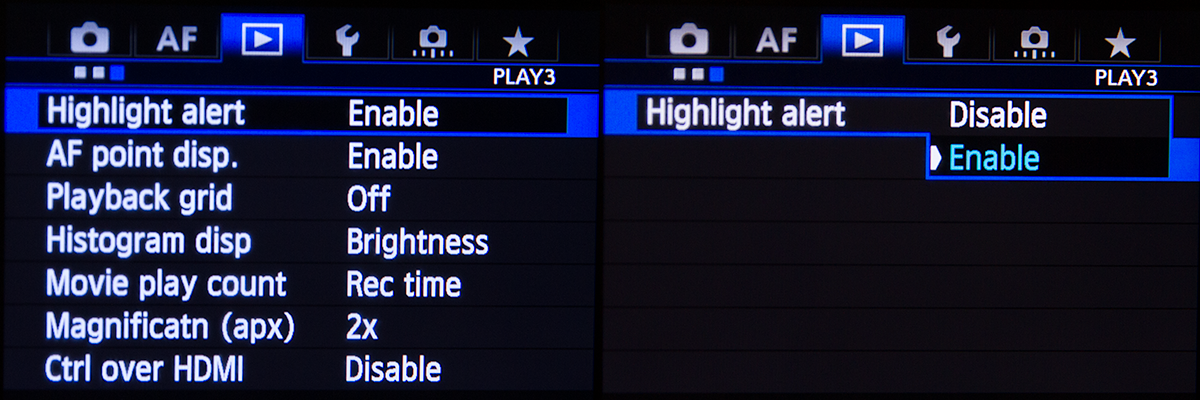
High Light Warning
Highlight Warning or “Blinkies” as people can call them is a setting in your camera when activated that will show you what parts of your image have clipped. Whats clipping ? Ok your image is made up of three colour channels Red, Green and Blue. Each channel has a range of 0 to 255. Zero is black and 255 is white. Clipping is when one, two or three of these channels has part of the exposure that exceeds 255.
Now clipping isn’t a bad thing but it isn’t a great thing. The good thing about the Clipping Warning is that is shows you parts of the photo that are clipped that you may not want to be clipped so you may have to adjust your exposure to correct. This is a very quick look at it and explanation. I will write a more detailed article about it soon. But in the mean time turn it on.
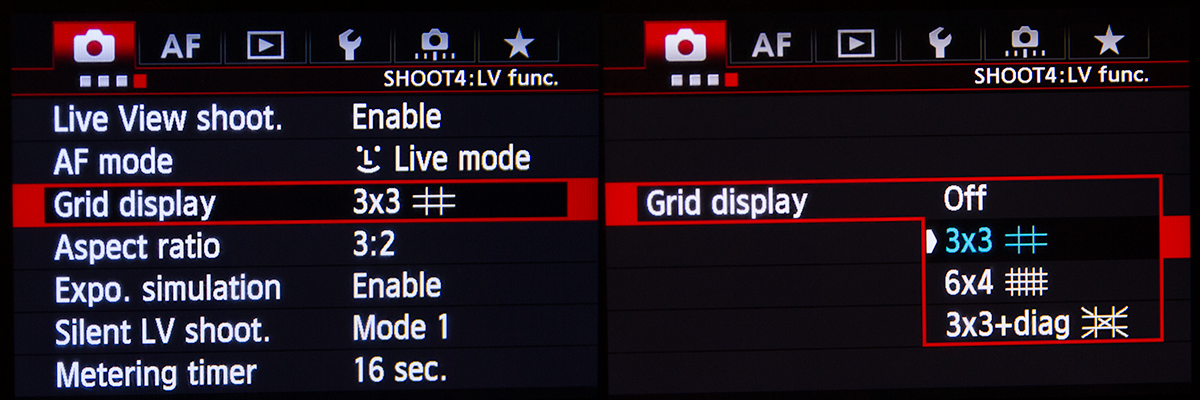
Grid Lines
Setting up the grid lines to appear on the back of your screen is an excellent “guide” to help you compose your image. I’m sure you have heard of the rule of thirds. Two thirds ground one third sky. Well these grids will help you compose your image to fit within these composition guidelines. Not an essential thing to turn on but well worth it.
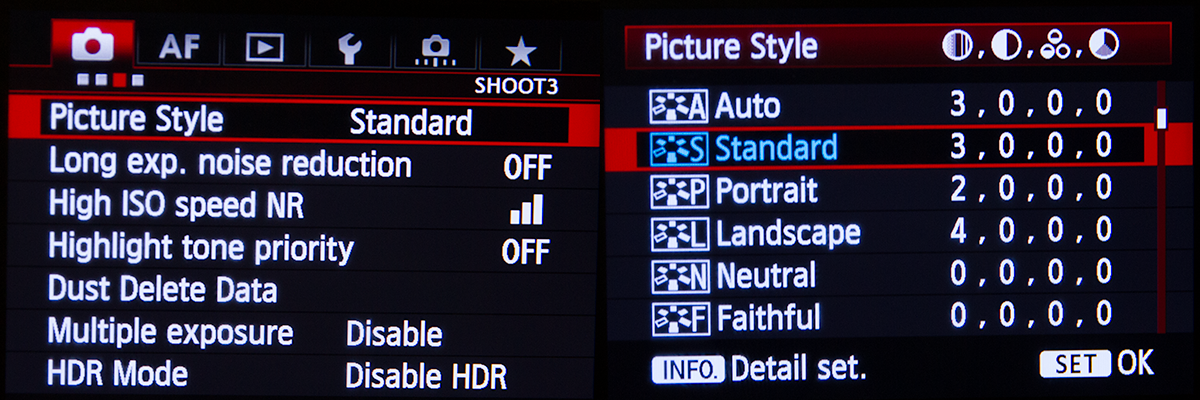
Picture Style
Picture style is another of those settings that will only effect your Jpeg capture. But the reason why I have mentioned it here is because the image you view on the back of your screen is a Jpeg preview this setting will effect that preview. The default is standard and I personally find this is the setting I use as it gives me a realistic idea of what the image will look like on my screen once I do some basic camera RAW editing. Neutral is quite flat and this is what your RAW file will mostly look like. Landscape can be too much and could put you and make you think your capture is over the top.
Again this is only a setting that will effect your Jpeg capture. It will not effect your RAW file.
Don't get lost in the settings.
Don’t get lost or overwhelmed looking at your camera manual. Remember that your camera is made for landscape photographers, sport photographers, portrait photographers, nature photographers and every other kind of photographer out there and each will have their own little menu tweak and some of the functions in your camera will be ideal for them. With the seven changes I have mentioned above these will ensure you have a solid foundation when you head out and take your first photos.
Please share the settings path you have for your camera make and model especially the newer ones and if you find or have a setting that works great for you and your photography post it here.

