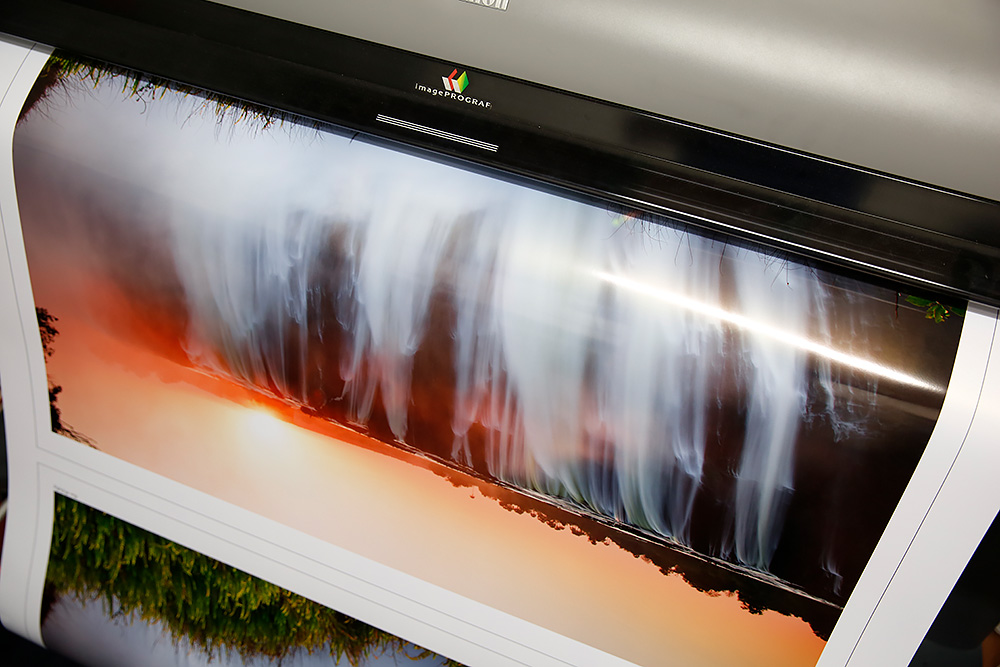
When it comes to printing your images especially for beginners it can be as confusing as understanding your camera’s histogram. For a lot of photographers it might be months or even years before they actually print one of their images off and when you do it is important to know how big you can print your images, how to supply your file to the place printing it and how you can make sure that your going to get a good quality photo back from the lab of your choice.
In this article, I am going to talk about how to keep your images in the right ratio for printing, sharpening your images for print, things to consider when thinking how big can you print your images, how your local photo lab can help you and the benefits of getting test prints done.
This is going to be one of those articles that will be worked on and updated as this is a very wide topic with a lot of information that can be discussed. If you have any additional questions please post them at the end of the article and I’ll be sure to answer them as best as possible.
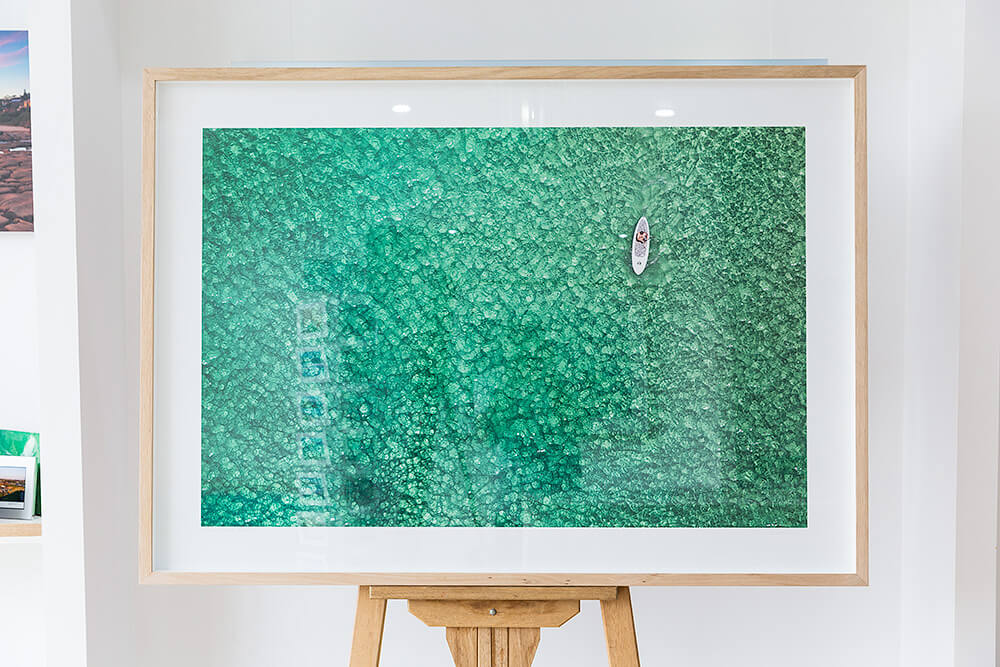
60 x 40 inch photo framed - shot on a Canon 5D Mk 2 from a helicopter.
FACTORS THAT WILL EFFECT HOW BIG YOU CAN PRINT
The size you can print at face value is based on the megapixel size of your camera, but it isn’t just all about file size there are other factors that will influence the size you can and will be able to print your image too.
1. The megapixel of your camera will play a huge part in the size your going to print, whether you shot your images as Jpeg or RAW will also affect the final size and what can be done with your file. With my Canon 5D Mk3 I can comfortably print my images high resolution on metallic paper 1.5 x 1 meter (60 x 40 inch). But if I cropped my image for a better composition and how extensive then my final print size may no longer be 60 x 40 inch as I have now reduced the pixel width and height of my image. It would be like shooting with a lower megapixel camera.
2. When printing your image you need to take into consideration the medium your printing on. Quite often a customer can want their image printed a certain size on metallic photographic paper or mounted to acrylic which needs a glossy print, but their image will not produce well at the size their asking, where printing on canvas at the same size because you have a textured surface will be much kinder and yield a better result.
3. You also need to think about the viewing distance as well. If you’re wanting to push your image to its limits or even beyond it might look great at 1 meter away, but if you got closer to say 50cm then you could see the image isn’t as sharp or detailed, but it’s not pixelised. You will find that when you print big it is hard to appreciate the whole image unless your at least 1 meter away anyway, for those with a higher resolution image what’s good is when you appreciate the whole thing from 1 meter away then if you want to get close you will be like “wow you can really see the detail” or “wow you can read the name of that building I use to work in” that’s in the background. That will be the difference between a high-resolution photo at the correct viewing distance and an image that isn’t high resolution. At the correct viewing distance, you will still see that the high-resolution image is better.
4. Image capture quality will also play an important part. Your file may have the pixels and dpi to print big but the image itself may have capture issues like poor focus and depth of field, hand holding with a shutter speed that was too slow and as a result, the image is not capture sharp, a high ISO was used and digital noise is very evident. This is were printing large will make these problems stand out and you might be best for a smaller sized photo.
5. Poor post production. This is a big one these days especially when photographers are still learning skills like exposure blending. When viewing the image you can see problems with the image and the blending, in some cases, the blending is just done with a brush tool and you can see bright areas where it should be dark especially in the sky around trees that break into the skyline or headlands and mountains that lead into the sky. Printing large will make these kinds of processing problems stand out.
6. If you have captured your images in jpeg your file is only going to be 72 dpi (dot’s per inch) then the working pixel width and height cannot be interpolated larger by adjusting the dpi lower as it is already below what’s needed to print high res. The industry standard for printing is 300 dpi, but photos can print extremely well at 200 dpi, canvas printing can be dropped lower if needed. For people with a low dpi image, you try and get their image to at least 100 or 150 dpi but to do this you will sacrifice print size.
DONT SHARPEN YOUR MASTER PRINT FILES
Photographers when editing their images tend to sharpen them at the end so they look nice and crisp before they save them to their hard drive as the final master file for that shot. This is not correct.
Sharpening your images isn’t part of the image editing process it is part of a printing or web display process. This is because the amount of sharpening you apply to an image is relevant to the size in which it is going to be printed or displayed on line.
All your edited and processed images should be sitting on your hard drive un sharpened. An exception to this would be the small amount of pre image sharpening you can apply when your processing your RAW file.
HOW TO SHARPEN YOUR IMAGES FOR PRINT
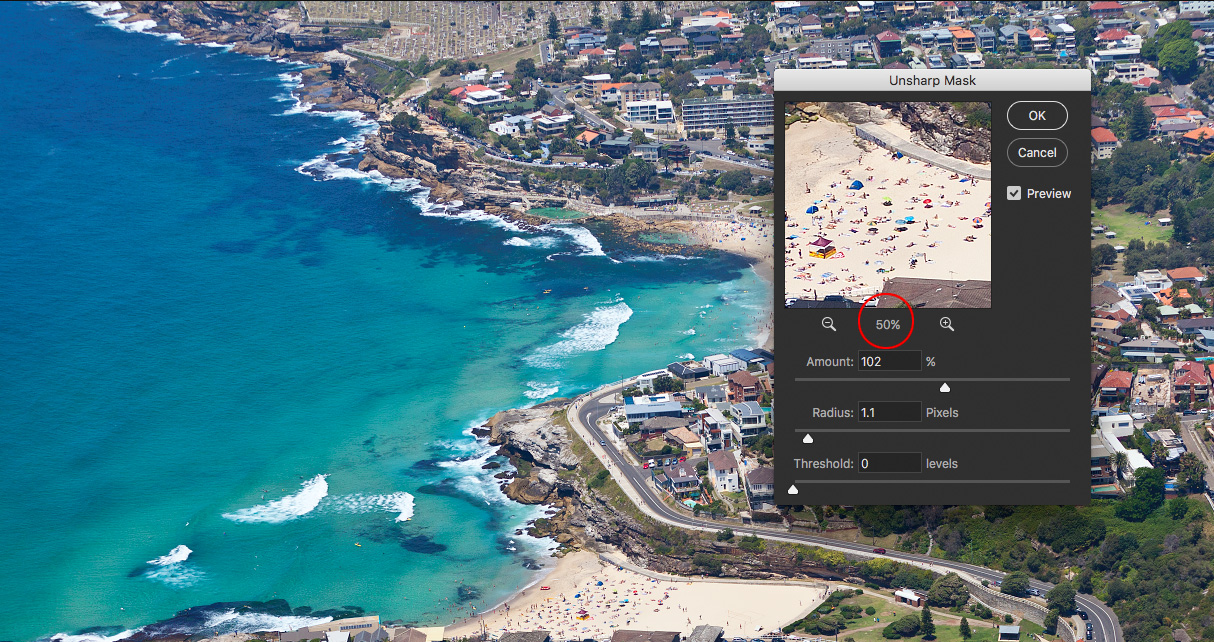
Now that we know sharpening your images is a printing process then how do you do it correctly. In photoshop there are many ways to do something and this is the process I use and it was recommended to me years ago by another professional lab on how you sharpen your images for print. I use this process every day when printing my images and it works great every time.
Step One: Resize your image to the size your wanting to print.
Step Two: Use the Unsharp Mask filter in Photoshop. Filter > Sharpen > Unsharp Mask.
Step Three: Set the preview window to 50% not 100%.
Step Four: Apply a radius around 1 pixel and adjust your amount accordingly to the point where the image just looks slightly over sharpened. The reason for this is when going from screen view to viewing your print your images will slight unsharpen anyway and the image will also unsharpen as part of the printing process slightly. Don’t apply any threshold.
That’s it. Simple and Effective.

WHY DOES PHOTOSHOP CALL IT "UNSHARP" MASK WHEN IT SHARPENS
The reason why Photoshop calls the Unsharp Mask, Unsharp as it is referring to a term that was used back in the day when people were working in a photographic darkroom. To make a shot sharper they took a copy of the original negative and made into a positive, this was intentionally blurred (made unsharp). Then both negatives were put together and exposed to light again and this is where the blurred portion of the positive cancelled out any blurry portions on the negative thus creating a sharper image. (Yes confusing). So this is why Photoshop calls it Unsharp mask, as it is referring to an old school dark lab technique. Guess they had to call it something.
KEEPING THE RATIO CORRECT AT ALL TIMES
Cropping your photo is something a lot of photographers tend to do to for a number of reasons, mostly it is to make the composition of the image better. The number one massive mistake photographers do when they crop their image is they crop it to what they think looks best and forget to make sure that their image is still cropped to the ratio of which it was captured.
For most DSLR cameras the ratio of your images is 3:2. This means that if you resize your images to say 12 inches long it will be 8 inches high which is a very common print size and will fit all the frames you can buy in shops for a 12 x 8 image.
Now if you took your image and cropped it forgetting about the ratio when you go to resize that image to 12 inches in length you might find that the height could be 7 inches or 9 inches or anything but it wont be 8. So when you go to fit that print into that pre purchased frame the matt within the frame will either cover part of the image or the photo will be narrow and not fit correctly in the frame and you will see the edge.
WHEN YOUR CROPPING IMAGES, YOU MUST MUST MUST KEEP THE RATIO CONSISTENT.
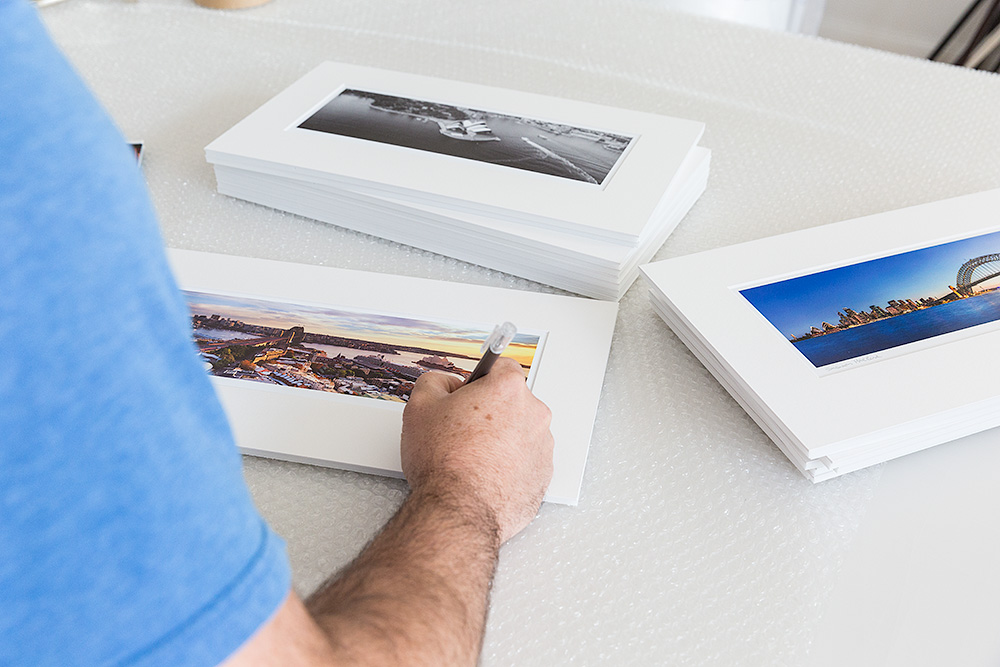
For photographers selling their work, this is essential. Let’s say for example your selling photos printed and mounted in a plastic sleeve and you want to display them in markets or a gallery. You’re going to want to sell your images in various sizes and you’re going to get the matt’s cut in bulk. A 12 x 8 inch (30 x 20cm) photo is a great size to sell mounted. If all your images are shot or cropped 3:2 ratio then you know they will all fit perfectly. But if you custom crop each image then your images aren’t going to fit in those pre-cut matt’s perfectly they might be too high so the image is covered by the matt, or too small and you will have a weird edge showing that doesn’t make sense.
Another point is if you’re going to custom crop your images to weird ratios (and I personally recommend that you don’t, keep it industry standard) but if you do, then make all your images that ratio, be consistent. I’d recommend keeping a master file in one folder of your uncropped images and then your cropped images in another, as when you realise that custom cropping your images too strange ratio’s was a mistake you already have how they should be. ie 3:2 (DSLR) or (3:1 or 2:1 or 2.4:1 or 4:1 panoramics) or 4:3 (point and shoot) and you don’t have to go back and re edit all over again.
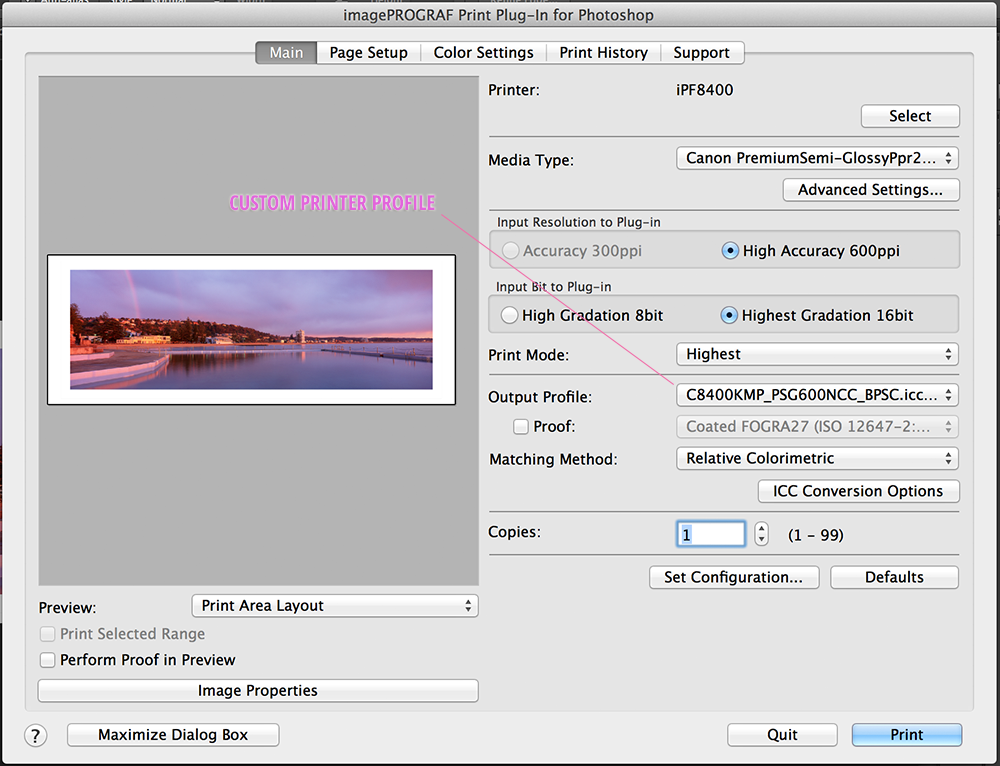
Still Creations custom printer profile for Kodak Metallic Paper made for our Canon ipf8400 printer. Cost $250
ASK YOUR LAB FOR ADVICE
When you take your images to places like Harvey Norman and Officeworks the level of quality you’re going to get is going to be very hit and miss. At one place you can get someone who knows what they’re doing and you will get a consistent result, but then that person can leave and then the quality disappears. I got some 6 x 4 photos done recently at Officeworks that I use for my greeting cards and the quality was well below what anyone should be paying for and the guy behind the counter running their photo production told me they only get one day training and he had no idea what Fuji was as they ran a Kodak system. For us photographers, that’s like someone who is meant to know about cars saying they know Holden but never heard of Ford.
When you take your images to a professional photo lab you will be talking to someone who actually knows about image creation, their systems will be colour managed, their printer will be profiled for the printer their using and the paper their printing on. If you get a photo printed there today and then printed their again in 2, 6 or 12 months later it will look that same as the first print as their system is consistent.
You should be able to ask the lab “Here is my image and what do you think.” You should be able to ask about what size you can print it. Over a year I lose thousands of dollars of printing work through my lab Still Creations because I tell people the size they want their image printed won’t look good and I recommend a lower size where they get a good quality image, in some cases, I don’t recommend they print the image at all due to the file size provided. I know other labs do the same as they care about people getting a quality result and the “well that’s what you asked for” response is for those that don’t care and just want your money.
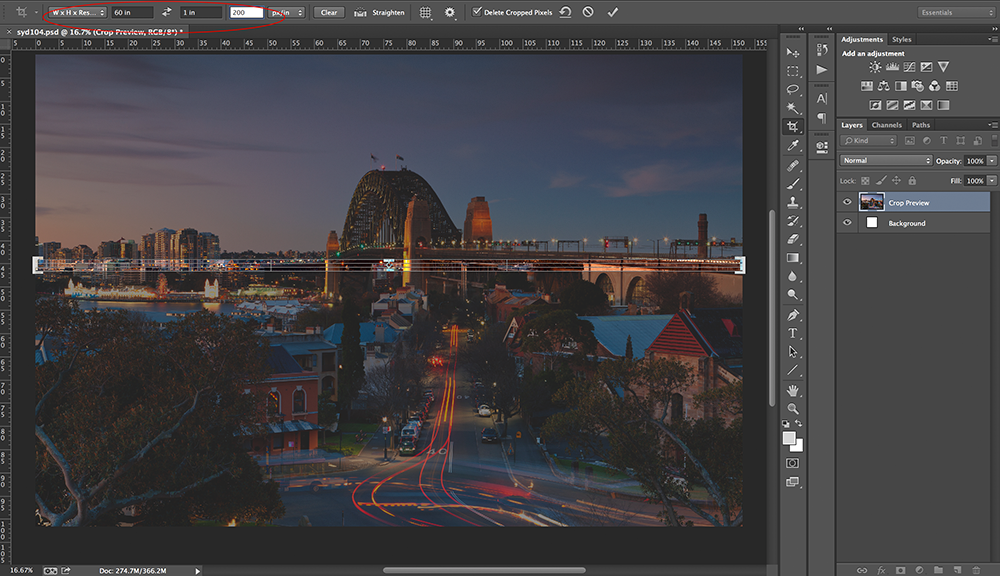
60 x 40 inch photo @ 200 dpi set up in photoshop - 60 x 1 inch test strip set up in cropping tool.
TEST STRIPS - THE PROOF IS IN THE PUDDING
The ultimate test to knowing and understanding how “your images” look is to print it. But nothing says you have to print a 40 inch x 26 inch shot or a 60 inch x 40 inch shot just to see. You can ask for a test strip.
What you do is you resize your image to the size you want ie 60 x 40 inch @ 200 dpi, then you take your crop tool and crop the image at an area where you think it best represents the detail you will want to see in the image. When we do this we recommend a strip at least 1 inch / 2.5cm in width. Now with that strip send it off the the lab letting them know the dpi of it as this is important, though they will see this when it is opened anyway. What they will do is print off the strip and you will be able to see exactly what your shot will look like at that size in regards to the detail and even the colour too.
If you supply a strip that is (60 inch) 1.5 meters long @ 1 inch wide, you don’t need the whole length you just want to see what it looks like, when we do this we pop the strip in gaps we have in print set ups. So the test strip you get might be 30cm long, or even a meter long just depends on what’s available. You might get charged a few dollars for this but it is a lot better off than paying full price for a 60 x 40 inch photo just to find out you went too far in size.
This is something every photographer should get done, regardless if they have a customer buying an image or not. You should know how big you can print YOUR images. Find a photo that best represents all your shots, good capture, good editing etc and get a test strip done of it.




Excellent, thanks for sharing
So great thanks for sharing!!
Nice info, I’m going to reread the part on sharpening. But one thing I thought to be incorrect, “If you have captured your images in jpeg your file is only going to be 72 dpi… ” Any image file has no resolution until it is reproduced and its pixels are spread out over its final display dimensions. Doesnt matter if it’s a tif or a jpg.
Hi Jon, it makes a big difference. If you have shot your images in Jpeg only the file has already been stripped of colour information, resolution and the colour temerature has been embeded as well. That’s the whole reason for Jpeg capture as it is a smaller file and smaller than RAW capture. If people want the power of a RAW file but not the size then they will choose an sRAW option that will reduce the pixel width of the capture but keep everything else like the exported dpi.
May seem like dumb questions. What format is the image sent in? What colour space should it be?
Hi Mostyn, If your using a print lab and you have a tiff or psd (photoshop document) file then send that as it is your highest quality file. But in saying that if you have a high resolution jpeg then that will do find just depending on the size you want to print of course.
For colour space they all print fine and it would be hard for someone to tell a sRGB file from Adobe RGB file when printed. The biggest difference is the loss of detail in high key colour. But if you can supply yoour images to a lab in either Adobe RGB or ProPhoto RGB. If your just shooting Jepg then your not going to have access to the ProPhoto colour space.
This has been a huge help to me. Thanks so much for sharing.
Your welcome Teena. 🙂
y5mwv5
mzjmlw
ixajlb
862lvj
9d5snr
fmc9b2
6d6eip
62la8n
trfkwz
rwg9nt
7q76qb
v1pks3
smtro1
lt0a3s
sazv37
e0qf2e
f3aee8
ilzdr4
xjm7qh
ovvl7y
4nemve
u76i3d
601z35
yrrear
p3glrx
c8pl4f
4sinlf
0775ru
8k2wh5
ogejdf
080bsz
vibsrz
btznu0
b6406w
cu1yqc
88dfpg
ohe7ii
6c8pfr
nwj8vi
eg8ev6
hch43y
rqlhrj
iw7t5r
l1hhhq
67xfit
e698xa
x86paa
pbusvy
vx6ter
ryt3ie
gsst4l
5hq1bq
d0ak15
hkbdrd
znosh4
8fv3x2
4hm45v
sxsx1w
q0lckg