If there was one bit of advice I could give someone who was just starting out with thier digital photography no matter what level they are it would be to have a sensisible and logical way of saving, storing and cataloguing the digital images they take. If this is something you havent done and your digital photos are a mess then it’s time to put aside a few hours and get your digital image housekeeping in order.
Now I don’t claim that I have the best system, but I have a system that works and I have a website where I offer customers over 1800 image to choose from that they can get printed and I need to know what image it is that they want, where that master print file is, where the master original image is should something happen to the master print file and also where the original digital capture RAW file is.
In this article I am going to talk about my simple and effective way of sorting through my photo shoots into folders, how I code the images that I create that are used for sale on my website, what file extensions to save your images as and how I go about backing up my images should anything happen.
BACKING UP YOUR DIGITAL FILES
When it comes to the safety of your images simply saving them to your computers local hard drive is not ideal and does not protect you from a hard drive or operating system error or theft. Also if your shooting a lot storing all your shoots and also the images you create from them on your local hard drive will eventually slow your computer down as you approach the hard driver’s storage capacity.
This is my method of image storage:
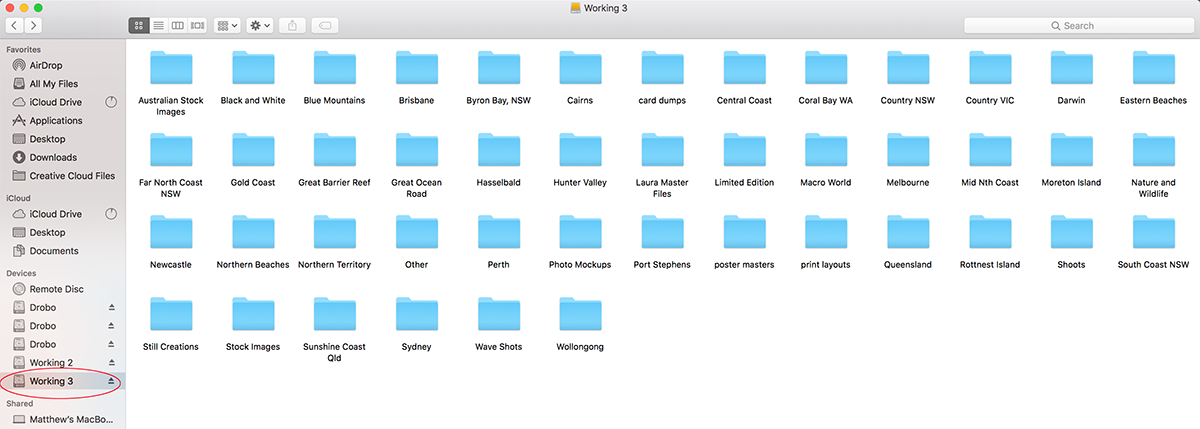
I use a Drobo which is a hard drive box that can take up to four hard drives. Each drive protects the other, so if one hard drive fails you replace it and the system will rebuild using that and no data is lost. In 8 years of using the drobo I have had two hard drives fail in it. In addition to my Drobo system, I have three other 2 TB hard drives titled Working one, two and three.
Working One is a full copy of what sits on my Drobo for my Master Print Files and Stock Images. This is stored at a location that is not my home or business. Use a trusted friend, family member, anywhere that it is safe.
Working Two: Is a full copy of the Drobo Master Print Files and Stock Images. Used in the gallery connected to my MacBook Pro.
Working Three: Is a full copy of the Drobo Master Print Files and Stock Images. Used in the gallery connected to iMac.
Very occasionally while working I have been known to save an image that has been resized over the master file sitting on the Working two or three drive. Because I have several copies all I do is copy the original from the Drobo or the other drive to correct the fault. Imagine if that was my only copy, would be painful to re scan the film and edit or re edit the digital RAW file.
** The Master Files sitting on the Drobo never get used for image creation. They are there as an untouched set of files for backup only / replacement. **
When I shoot and create new images I add them to the Drobo Master Print Files drive and I use a program called Good Sync that updates all the images, across all the drives so they all stay the same.
Every few weeks I will get Working One and update it with the Drobo Master Print files, then use Working One for the day to make sure that the drive works without any problems, then it goes back to its location.
At no time do all the drives stay overnight together. Working Two and Three stay with me all the time with my laptop.
A number of years ago a landscape photographer in Victoria had their house broken into and the scum bags not only took his camera gear they also took his hard drives and he lost everything, years and years of images gone and he had some really nice stuff, I can’t even imagine what that would feel like, but it is a wake-up call for anyone who has digital images they can’t afford to loose.
CATALOGUING / SORTING THROUGH YOUR DIGITAL SHOOTS
I’m sure everyone has a process of how they store and reference their photo shoots and this is mine.
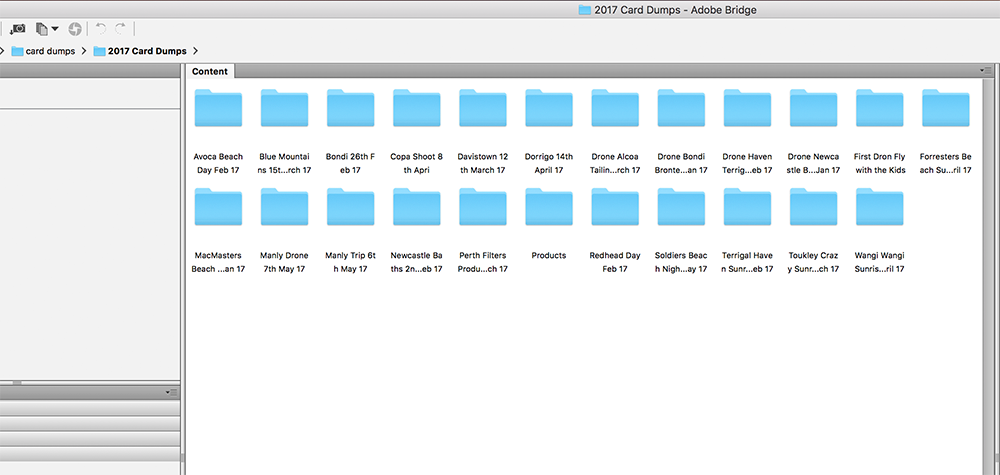
At the start of the year, I create a folder called 2017 Card Dumps. Then when I do a shoot I connect my external hard drive to my Mac and I connect my CF card to my computer and I rename the folder on my CF card accordingly. So if I did a sunrise shoot at Bondi Beach on the 9th of June 2017. I would title the folder “Bondi Sunrise 9 Jun 17”. I would then copy this folder to my hard drive under 2017 Card Dumps.
I then take my card out and put it back in my camera. Nothing worse than going out for a shoot the next day and when you take that first shot it says “No CF Card” on the screen. You only do this once especially if it was a great sunrise. When I do put my card back in my camera I don’t format it, I only do this once I know all the images off it on the hard drive are ok.
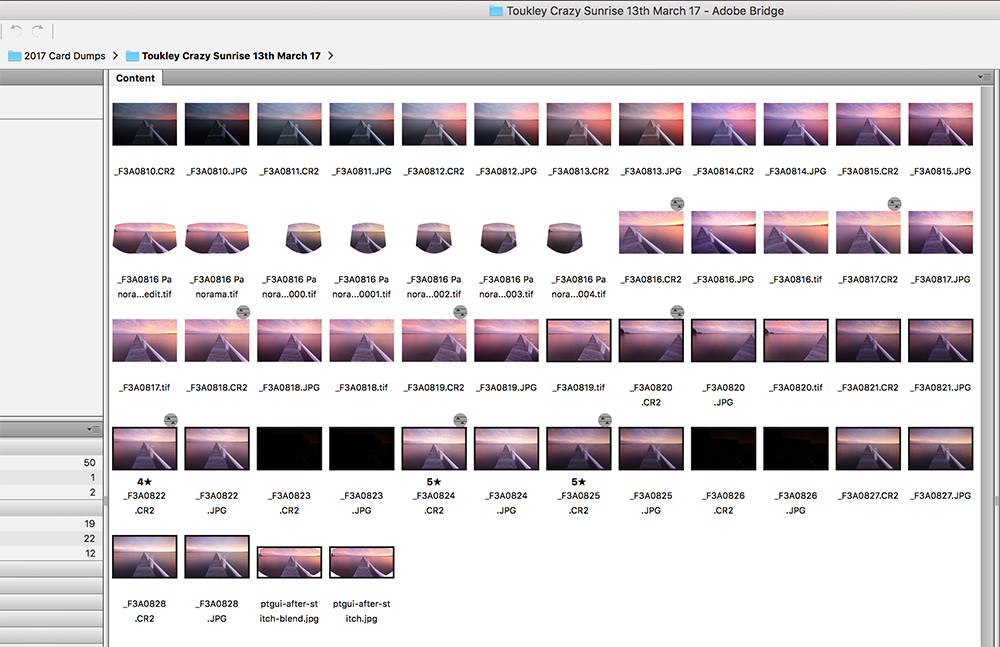
In this Bondi Sunrise 9 June 17 folder now on my hard drive I will go and star rank the images I like, if I do any stitches I will save an unedited master copy in this folder. As you can see in the image below there is a stitch done in Pt Gui that has been saved in this folder along with the files that made it.
Some years when I have done a lot of travelling or done a lot of aerial shoots or surf shooting I will break up and have sub folders in my 2017 card dumps like Aerials, Surf, Melbourne, Mid North Coast, Newcastle, Sydney etc.
SAVING IMAGES WITH THE CORRECT EXTENSION
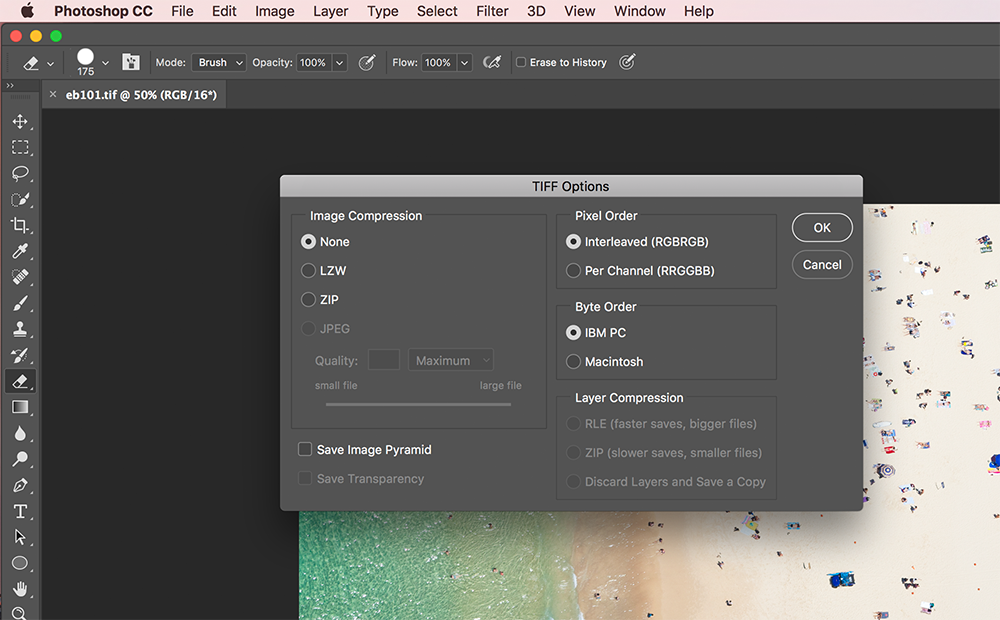
RAW FILES: After you open your RAW file into an application like photoshop or saving from lightroom you will have two file choices. These are .tiff and .psd. There is no real difference between the two in terms of saving the file it is more about portability of the file. The .psd file is an extension where you can open the image in different Adobe products with layers and use and adjust those layers accordingly. Where if you opened a layered Tiff file then the compatibility may not be there for adjustments. If you saved a flattened tiff or psd file they are the same. One advantage to saving a TIFF file is using the LZW compression but only do this if you’re sending your master print file to someone and you want to reduce the file size to upload. Don’t use this option for your master print file save.
JPEG: If you have made the mistake of shooting your images as a jpeg and not a RAW file, or your camera only allows you to shoot jpeg or you have no need for a RAW file then make sure you always check the maximum quality setting when saving your image.
GIVING YOUR IMAGES A LOGICAL CODE
On my website I sell over 1800 different photos from locations all around Australia. When a customer buys a photo off me, I look at the code of the image and I immediately know the location of the image on my hard drive and the exact image as well. It doesn’t really matter what kind of coding you do as long as it is logical and makes senses, but it is also important that the codes make some kind of sense or look neat, especially if the codes are on a website and a customer needs to use them to let you know what image they are referring to.
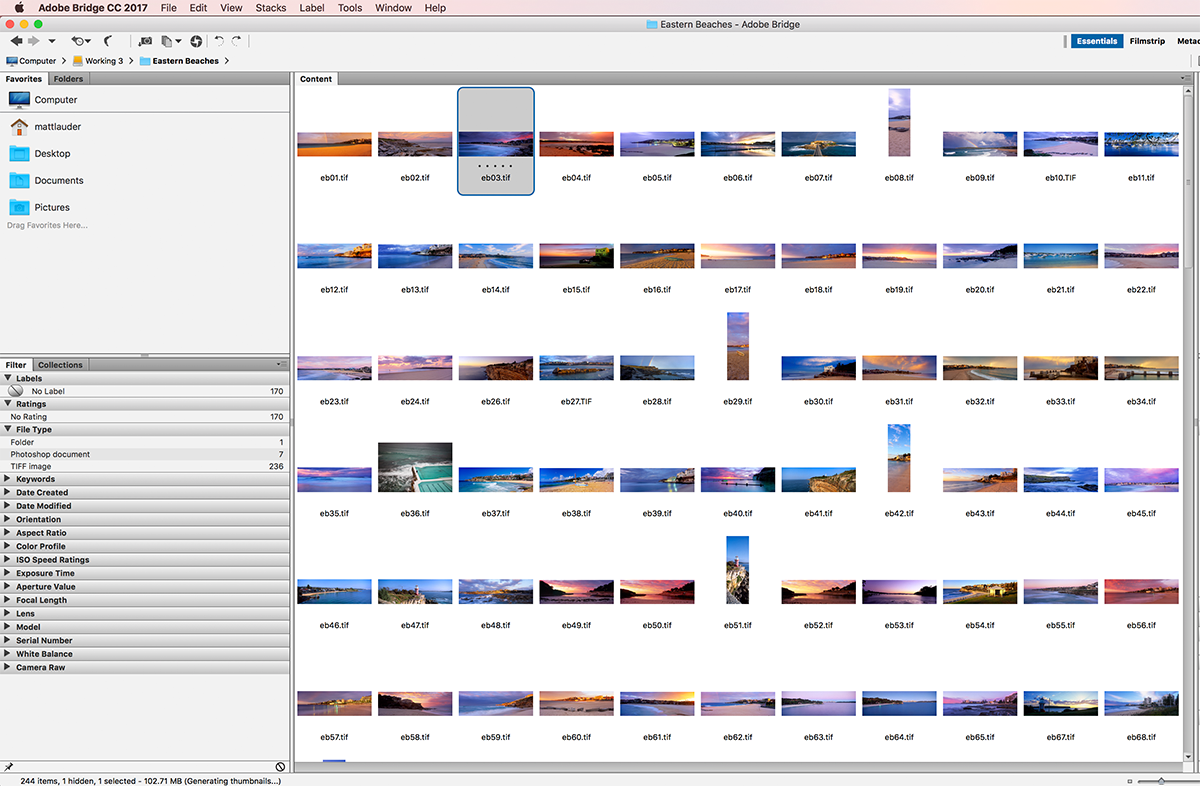
The coding method I use is the same I have seen numerous other photographers use, it make’s logical sense. The image above is a list of the images I have in my Eastern Beaches, Sydney folder. Every image starts with EB (for Eastern Beaches) and then a number in the sequence of which they have been added to the folder over the years. It is as easy as that. But what is important is to have a system of coding and this coding is only applied to the final images I create that are used on my website. I don’t use an individual image coding system for all the photos that I take.
CONCLUSION
There isn’t a right or wrong way to do any of this. The only wrong way is to be doing nothing. Some processes that people have would be better than others. But the simple fact is to make sure you back up your work (somehow) and that you have a system in place where you can find and reference your images days, months or years down the track. I know my method isn’t perfect and I could move to a better more streamlined process but this is what works for me and I know my images are safe and I can reference them at any time, sometimes finding the RAW file for an old shoot years ago can take a bit of time. Sorting out my panoramic film shots is another headache altogether.
If you have an improvement on what I have talked about above or wish to let us know your process of saving your images or cataloguing then lets us know.




kficuy
wxtn43
saw1y3
grzfbi
pavf15
4leur1
qeahyl
e4idli
hk5278
9cymnx
r4y2bz
sqtfla
10c6he
2z9xpe
mp0chq
31xa7x
agaslk
k32kdp
0a8gyg
1u5a8u
bgmjpq
0tqx55
9t28w1
74tsjm
snmiqd
uvp71x
7koqru
0uhobq
105ihk
i2dild
0bsi3m
5k5cub
6no58r
3setoe
dtthbe
msj0d7
v0exm9
vppcaf
y37fpk
9qx169
j14vlp
knmdzi
8yojt2
ongtvr
s4teqr
d9vqcu
n24qwb
f61wq7
ddl66c
6vt73l
4s1ub4
iblogi
n5ygsg
koafrd
ry9kov
a0z5vv
op66u7
c774lv
i0d0ct
js4nqn
aiofbh
wriip9
34768c
vf0hku
d359du
vtvj1p
ww2nh7
mdjjqm
fj40nj
0k9pjz
bnf2xo
5obqgy
gb8mwm
zyl3mz
q3b7hr
cy6s0y
gtpeby
yox1y3
jraiyn
h92l6v
oi30uo
mz4zgn
3i71mt
jez3e7
c4vfd8
rkbfjl
qfn35a
nehput
9xxqnf
5bh6b4
u86mro
g11eza
ul756n