
 Another successful outing with the Canon 5D Mark II.
On this morning the cloud over the horizon wasn’t overly special and looked overcast. But I saw potential in the back light that might be created so I grabbed my gear and headed out and this is what I got…
This location will also be great on a good sunset as well. As the sun rose over my left shoulder and it will set over my right. Sometimes the back light is the best to shoot. The light is so easy to control.

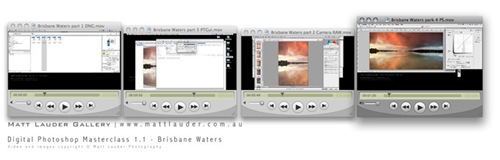
I have made the post production workflow of the top image into a full video tutorial. The tutorial shows how you can open your Canon 5D Mark II RAW files in Camera RAW with CS3. (saves you upgrading to CS4 if you don’t want to). Then editing of the files in Camera RAW, stitching using PTGui to final post production in Photoshop CS3.
Like in all my tutorials nothing is missed out, you see the full post production of the image.
Instant Download for only $12.95.
So you can be watching this image come to life from start to finish in no time.
Tutorial running time: 31 min and 32 sec
Click here to view tutorial.


dude, see I told you digital was all right.
great pics mate
Nice shot matt……
Cool image! Watching it come together…
A brilliant set of videos Matt. I’ve learnt something new in every part of the new set of tutorials. There were some great tips for PT GUI users’, and a few tips for fixing previously ruined images suffering from having spots of water/dust on a lens or a filter that will probably rescue a few of my rainy day farm stitches. There’s a lot of clues to image editing that seem new and the ‘grad’ tips’ will be very useful, B+W layers to get some detail back, wow! The hardest part of going ‘Digital’ for me was image finishing, when you can watch someone talk you through and present some examples (again and again) it makes it that much easier and encourages experimentation (all images are different), this helps you realise what works for you. It’s a great tutorial, recommended, just like the others.
Five Photoshop stars out of five for this one (apologies to JJJ movie guy).
Thanks guys…
Cheers Rod, hope you enjoyed the tutorial as well.
Cheers Matt it is great to hear that you enjoyed the new tutorial and that the others have helped a lot so you can get the most out of your work.
I got a few more in the pipe line.
great image mat, maybe you could send a copy to the iguana gate pollies as a keepsake….. I’m going to downlaod that tutorial, have to get into the digital age sometime (after my latest processing bill of $300+), and want to see what is involved..
Mike I know what you mean. I have 11 rolls of film to process. The bills are adding up way to quickly these days and film processing is a killer. Just glad we both have Imacons and dont have to pay for scanning as well.
Matt,
Tutorial was great, best 12 bucks I have spent for ages, apart from the three beers the other day, but thats another story.
I need to watch it again as It was early this morning and I was kind of falling asleep… not the videos fault, but mine….
Off to tassy next week, maybe, so hope to have some new shots to post soon.
I’ve downloaded this and found it to be very useful.
I can recommend it to anyone who is thinking about it…get it!!!!
Cheers
Great shots Matt. Are you ever going to use film again?
Thanks Merv.. glad you enjoyed the tutorial.
Dan… yea I will still shoot film, but I will be more selective with what I shoot. No point shooting film and digital at the same time to find that your digital shots have the same if not better colour. My digital panoramics have a resolution and detail clarity that I cant even get when scanning Velvia slide at 3200dpi. Scary.
love the third one mate!
great shots matt…. i have just got one of ur videos and i loved it, i think im about to download this one now!!! cheers for the tips!!!
Thanks Clint.. I have received a lot of great feedback from people on them. Cheers.