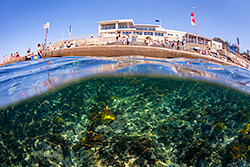
Long exposure photography comes down to achieving shutter speeds not possible without special ND (Neutral Density) filters to slow things down, with the control of shutter speed you also need a correct exposure.
So what constitutes long exposure photography ? On sunset or sunrise it could be one or two minutes, it could be 5 or 10. During the day when your shutter speed is usually anything from 1/125th of a second and faster a long exposure could be a 1 second shot where on sunset or sunrise this would be considered a relatively normal exposure.
For me, I look at long exposure photography as any exposure where you manipulate the light in order to extend the shutter speed that is outside of what is achievable without a ND filter. In this article I am going to walk you through some images of mine where I have used full ND filters to control and manipulate the shutter speed.
While some of these images don’t have the classical long exposure look I feel their good examples where full ND filters have been used to control light for shutter speed movement, so they have been added.
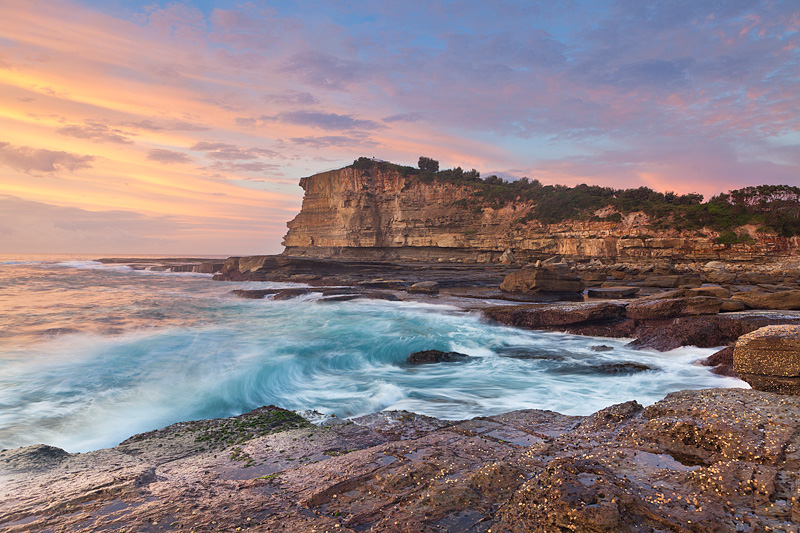
The Skillion, Central Coast, NSW - F11 @ .06 sec, 100 ISO
Kicking things off this photo of the Skillion rock formation on the Central Coast of NSW in Australia is a great location to shoot and control your shutter speed for foreground movement in the water. Looking at this image it’s not really a long exposure for a sunrise shot, but at this time of the day the shutter speed was more like 1/15th of a second. To achieve the shutter speed of .06 of a sec for ideal water movement I used a full 3 stop B+W ND 0.9 Filter.
This means that my exposure without the filter would have been 1/13th of a second. Now to achieve the .06th of a second I could have changed my ISO to 50 to drop it one stop and then changed my Aperture from F11 to F22. But shooting at F22 is unnecessary and unless needed I don’t shoot at that aperture for various reasons. So the ideal and best approach was to use the 3 stop ND filter.
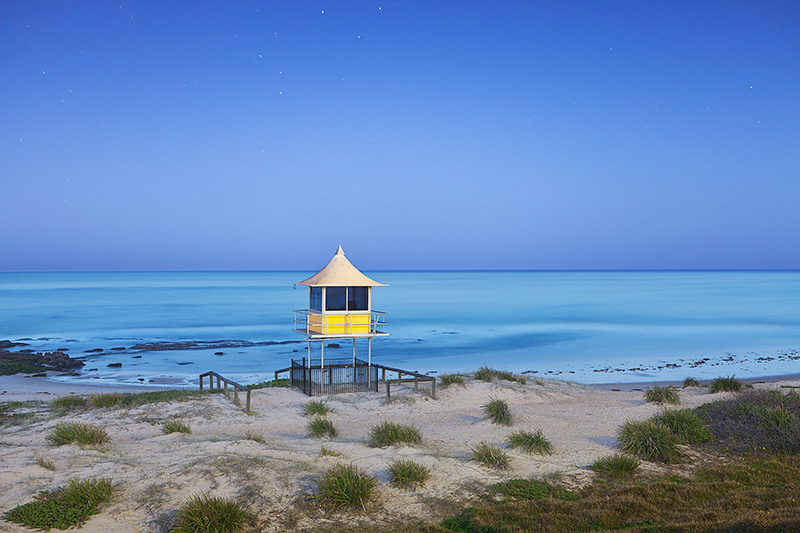
The Entrance, Central Coast, NSW - F11 @ 199 sec (3 min 19 sec), 100 ISO
Now this is a nice long exposure on sunset. We even have star trail movement in the sky. Using the Lee Filter 10 stop (3.0) Full ND Filter I was able to achieve this effect where the ocean looks like polished glass. With a final exposure of 199 seconds @ f11 and 100 ISO if we work back the math to the original exposure time without the filter we would have been around 1/4 of a sec. When your shooting beyond 30 seconds you need to put your camera on “Bulb” and shoot with a remote (I use the Canon TC-80N3 Timer Remote Controller
) though the Canon RS-80N3 Remote Switch
would do the same job. You should have either one in your camera bag.
When shooting images on sunset for this long you need to take into consideration the light that your loosing during your exposure. If your exposure is for 4 minutes you will find that 2 minutes into that exposure if you were to start then, your exposure might be for 8 minutes. (1 stop) so this loss of light needs to be factored into your final exposure time. So a 4 minute exposure might need to be 8 minutes to be correct. This is where long exposure photography can be both fun and frustrating. But at the end of the day remember one thing. If you shoot for 5 minutes when it should have been 10, it is only a one stop difference that your wrong and you should be able to fix this in post production. Yes 5 minutes does sound like a long time, but it isn’t because of the lack of light. It is no different than shooting an image at 1/125th of a second when you should have done it at 1/60th, that’s a one stop different as well. (If you want to know more about Stops, please ready my “What is a Stop” article).
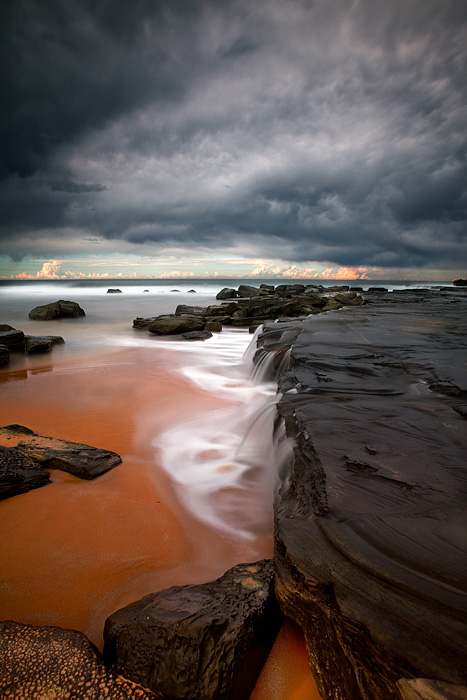
Forresters Beach, Central Coast, NSW - F11 @ 10 sec, 125 ISO
Taken on a dreary overcast day is the perfect time to break out the ND Filters. At this location I saw the water cascading over the rock ledge every few minutes and I knew it was going to be a great shot. For this image I used my B+W 77mm ND Neutral Density 3.0 which is a 10 stop filter. With an initial shutter speed of 1/100th of a second the addition of the 10 stop filter takes me to 10 sec. More often than not when I take my first photo using the 10 stop filter due to the nature of a filter so dark the image might require some minor adjusting to get the exposure correct. For me this is almost entirely done by adjusting first the shutter speed if a shot isn’t shutter speed critical like this one, meaning that a shot for 10 seconds or 13 seconds will make no difference. But in the case of the top Skillion image a shot of .06 of a sec or .08 will give a different water movement effect.
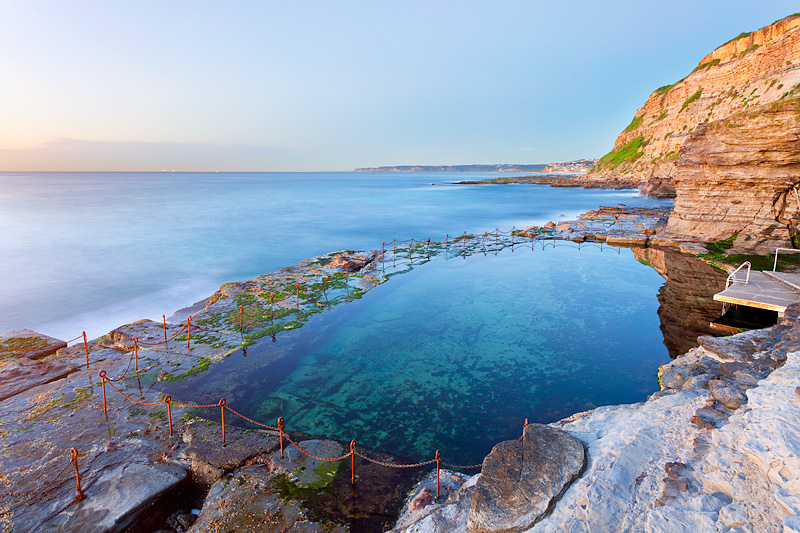
Bogey Hole, Newcastle, NSW - F16 @ 41 sec, 100 ISO
With this image you can clearly see that the sun is spreading a strong amount of ambient light, so sunrise is not to far away. In this image the idea was to have the water flat so the rock pool was totally clear. At this time of the morning a 10 stop filter was to extreme, my three stop B+W was not enough, but using my B+W 77mm 1.8 Neutral Density Filter giving me 6 stops of reduced light worked perfectly.
The B+W 77mm 1.8 Neutral Density Filter is my favorite of all the ND filters I have in my camera bag. It is the most used of the three types I have 10, 6 and 3 stops filters.
With this image and speed of the rising sun at this time of the morning my inital camera readings would have been.
F11, 1 sec @ 100 ISO (this is an approximate given my final exposure was 41 sec at one second with six stops the required shutter speed is 1 minute) What I would have done is just cut the exposure short by 1/2 a stop because the light change was so quick and also based off past image captures prior to the one being used. This kind of photography is guessing with knowledge.

Filters for Long Exposure Photography
The following images below are the exact filters I own and use for my long exposure photography. I use both the brand of Lee and B+W. The images are clickable links to the filters on the Amazon store for you to look at and research accordingly. Because of the lenses I own they are links to the 77mm filter version. The B+W filters are the MRC (Multi Resistance Coating) version which are more expensive, but the other standard versions will do just as good a job.
When buying the Lee Filters Foundation Kit you will need to buy an adapter ring that will screw into the front of your lens to allow the foundation kit to clip onto. When buying the adapter rings try and buy the W/A version (Wide Angle) this will hold the filter kit closer to your lens to avoid vignetting, which is your filter kit falling into view through your lens, it’s not good.) This is an example of the adapter ring I have for my 77mm lenses. The Lee 77mm W/A Adapter Ring
If your deciding which brand or path to go, personally for me I would choose the Lee Filters over the B+W purley because they slide into the filter holder and are not required to be screwed into the thread of your lens. This will save you a lot of time when it comes to re positioning your shot and also focusing as with the 10 stop filters you need to focus prior to fitting them over the lens.
One other important factor is I have recently upgraded my lenses to the new canon version and with this is a lens width change from 77mm to 82mm. Now my B+W filters cant be used on my new lenses. If I had both the Lee Filter Big and Little stopper all I needed to do was buy the Lee Filters 82 W/A Adapter Ring. This would save hundreds of dollars. Always best to think ahead.

