When someone says the word polariser it’s hard not to think of those beautiful blue sky’s and that deep blue you get from using a polariser, but did you know that polarising a summer’s day sky is just one of a number of uses for your polariser. As you explore photography further you will be looking at more ways to control light in your images, depth and also mood and your polariser will play an important part in this. But like all things in photography the incorrect use or knowledge about using your polariser can make you go home with a card full of images that you wish you had shot differently.
In this article we are going to discuss the correct use of your polariser, when to use them, the types there are, how they effect your images and a technique called Polariser Blending.
WHAT IS A CIRCULAR POLARISER
Your Circular Polariser is made up of two rings each holding a different piece of glass. The first piece at the front is a linear polariser and this is the part that rotates, the rotation of the polariser is what allows polarised light to be filtered out of sunlight at the strength you apply the rotation of the filter. The filtering or absorption of this light is what makes the sky darker, colours richer and clearer and glare or reflection on water removed. The back piece of glass on a Circular polariser is called the quarter wave plate, the quarter wave plate is what takes the polarised light and makes it circular and this is needed for digital slr cameras to read the light correctly as linear polarised light can cause the metering and auto focus to not function as it should. It can also effect the anti-aliasing filter (low-pass filter) in your DSLR who’s job it is to reduce things such as moire patterns and false colour patterns.
On a film camera a linear or circular polariser will have the exact same effect, it is only when fitted to a digital camera that it needs the quarter wave plate to turn the polarised light circular, for reasons stated above.
WHEN YOUR POLARISER WORKS IT'S BEST
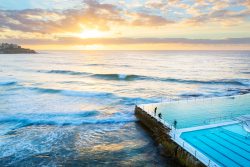
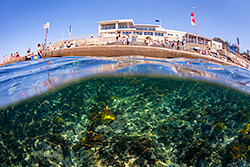
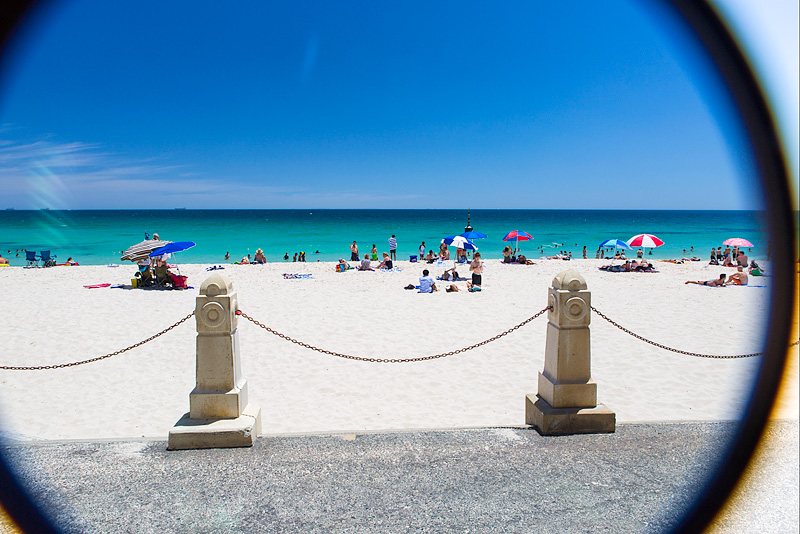
In my experience there isn’t many situations where you can’t use a polariser, it dosen’t mean that all the shots I take use one, most of the time I don’t think of pulling it when I should. The image above is your most common time you see a polariser being used and it’s effect is very obvious. But your polariser can work just as effectively on a sunrise and sunset scene and add a really nice amount of depth and background colour to the sky. The polariser is a great addition to shooting waterfalls as the filter will remove glare off rocks, vegetation and the water again giving your shot a smoother transition of light and depth.
A key point to remember with the polariser is it acts similar to a Neutral Density Filter in that due to the darkness of the filter you will have to adjust your exposure once it is applied. A polariser will add about one and a third stops of light to your exposure once screwed onto your lens. This comes in handy for waterfalls and even sunrise or sunset scenes when you want to slow down your shutter speed for movement effects in the water. If you don’t know what a stop is please read our article “What is a Stop” for more information.
GET TO KNOW YOUR POLARISER
Knowing your polariser is an important step to using it correctly and creating great images. The best way to do this is to pull it out all the time and check what effect it has in different directions. You don’t even need to screw it into your camera, just hold it up and rock the filter left and right in your fingers and you will see the effect being applied.
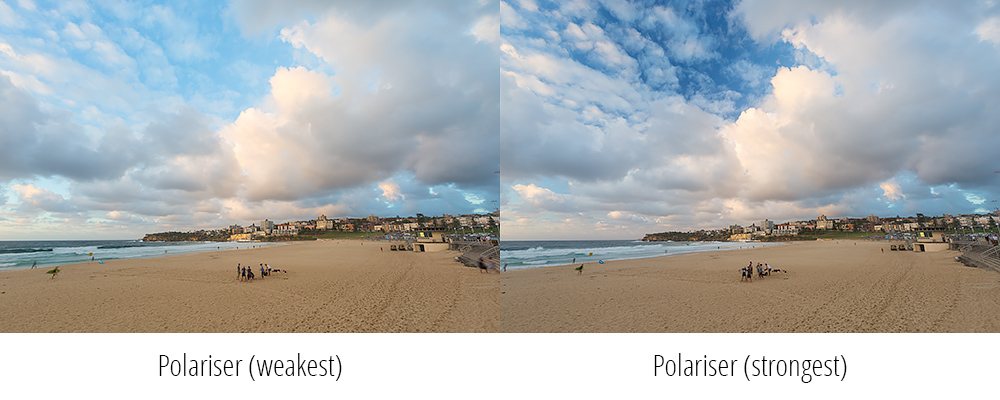
What you will start to notice is the polariser will be stronger 90 degrees to the light source. So if your standing at a scene in the morning and the sun is rising to the left you will find that the polariser will be strongest to the far right of the scene.
BE CAREFUL OF OVER POLARISING
One important thing to remember when it comes to using your polariser is to learn the difference between what your eye sees and what is captured. This is a trap all photographers have fallen into where the image through the lens with the naked eye looks amazing when you make sky an amazing deep blue, but your digital camera has recorded something quite different.
When your polariser starts to polarise a section of the image it is removing glare. Because glare is bright it sits more on the right hand side of your histogram where brighter areas and highlights of the image live and in this area is parts of the image with a lot of captured information. Now when the polariser removes that glare quite often that highlight will be removed and that part of the image will now move across the histogram from the righthand side to the left in the areas where darker tones live and shadows, an area where captured information is less.
Now you might be thinking big deal, but when you go to process your image what you will find is when you go to brighten up that darker area it dosen’t have the information in it to give you a nice clean adjustment and your left with a muddy looking area and this is even worse when it comes to over polarizing a blue sky on a summers day.
So the point I am trying to make is when it comes to using your polariser just be careful when it comes to the strength you apply. By all means apply it at the maximum setting to see what it looks like, sometimes you will get away with it, sometimes you won’t. The best thing to always do is to shoot a range of images with the polariser at different strengths so no matter what your going to go home with a winner.
BUY THE RIGHT POLARISER - LINEAR V's CIRCULAR
Did you know that where are two types of polarises you can buy Linear and Circular.
With the explosion of digtal photography the Linear polariser will be harder to find and less common and for good reason. Due to the way the mirror in your Digital SLR cameras are made the camera will have problems metering the light correctly for exposure with just a linear polariser due to the angle the light comes into the lens and the reflex mirror in the camera, so the circular polariser is a linear polariser with a second element added to it called a quarter wave plate which allows the light to enter the camera correctly without causing problems. For more detailed reading on this you can check out a good article written by Bob Atkins titled “All about Polarisers, Linear and Circular“. So if your buying a polariser for your digital camera make sure it is a Circular Polariser.
When buying your polariser try and purchase the one that is Slim Lined, all this means is the filter is thinner than your standard one which is great when you have a wide angle lens as the chances of vignetting (darkening of the images edges) which in this case can be caused by the filters thickness encroaching on the lenses field of view so a slimlined filter will eliminate this.
PROGRESSION OF ADVANCED SHOOTING WITH A POLARISER
At the end of the day a polariser is a polariser and there easy to use, but when your looking at shooting with one in an advanced shooting technique it is more about the application of the polariser than just the filter itself, if that makes sense. The polariser is one item that you can’t replicate in photoshop, there is no way to remove glare off a rock or water. There are a number of landscape photographers out there that do away with graduated neutral density filters and opt for exposure blending and the only filters they have in their bag are full ND filters and a polariser as there is no way to slow your camera down sometimes without a full ND filter and there is no way to photoshop in polarised light.
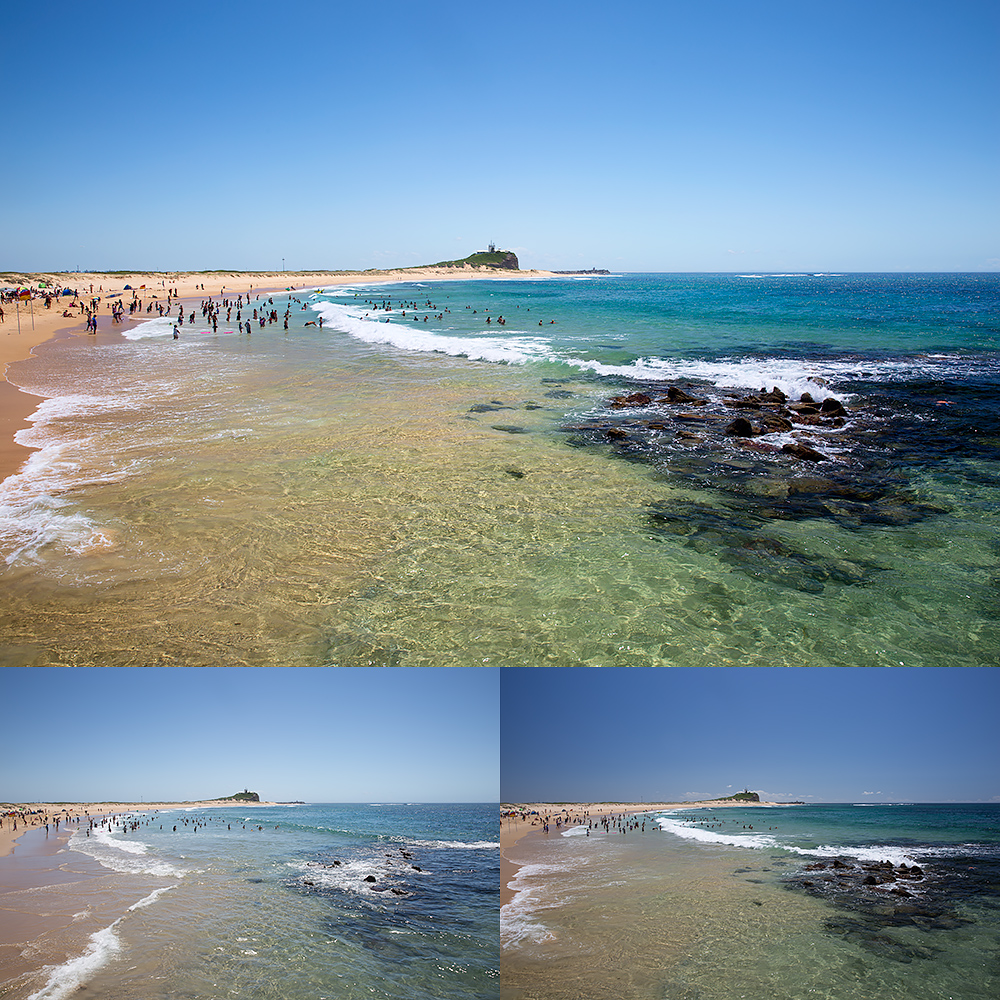
For me the advanced way a polariser is used in photography is through “Polariser Blending”. Just like exposure blending where your taking several images of different tonal value and merging them together in photoshop to make a perfect image, the same can be done with images that are polarised at different strengths. I have frequently shot with a polariser where I love the effect in the water at a maximum setting, but the polarisation in the sky is too much.
In the image above this is exactly what I am talking about. The small image in the bottom right has the polariser effect at maximum effect and will not edit well in the sky but the water in the foreground is rich with colour and has no reflection. The small image in the bottom left has the polariser backed off to about 50% strength. The sky is nice but I have lost the depth in the water, along with its rich colour and overall the image is lacking. The large image is both the images blended together and then edited and the overall effect in polarisation for this scene is a perfect balance, that couldn’t be achieved in a single shot. Not all images need to be shot like this, but if your faced with a scene where you have your doubts just remember that you can take multiple shots at different strengths to just see.
A lot of the time with photographers an advanced shooting technique is about thinking about the images you need to get the final result. It’s not hard to shoot with the polariser at 100%, then 80% then 50% then 20%, but you have to think about doing it at the time, knowing what you need later and how to get the shots required to get that result. That’s what’s advanced about it, then of course making it happen and putting it together in Photoshop.


