So you have just completed your first helicopter shoot, you have handed over your credit card and paid for the time you spent in the air and now it is time to see what you have on that camera card of yours and to see what worked for you and what didn’t while your in the air. The time you spend reflecting on your shoot is what will make your next one even better. Look at all the information I have been able to share with you as a result of going up over 10 times and it’s all from learning from my last experience of what I did right and especially what I did wrong through my whole process of finding the helicopter company, planning my shoot, doing the shoot and then reflecting about it all.
In this article I am going to run you through a few things that I always do after I finish an aerial shoot.

SAVE YOUR IMAGES TO A SEPARATE DRIVE
One of the first things you need to do is to save your files on your card to a separate drive. I have a special hard drive that has a folder called Card Dumps > 2017 and all my shoots for that year go into that folder and the hard drive is also duplicated on another hard drive as a back up.
When ever I plug my CF card into the reader I always make sure that the reader is not connected to my computer. I find inserting the card into the reader and those lines of pins a delicate operation. One time I did it when it was connected to the computer and the card just didn’t go in correctly so re aligned it, once it connected it appeared to have corrupted the card and I lost everything on it. Since then I have never connected the card while connected to the computer, I just don’t trust connecting the card to the reader when it is powered.
STAR RANKING YOUR IMAGES
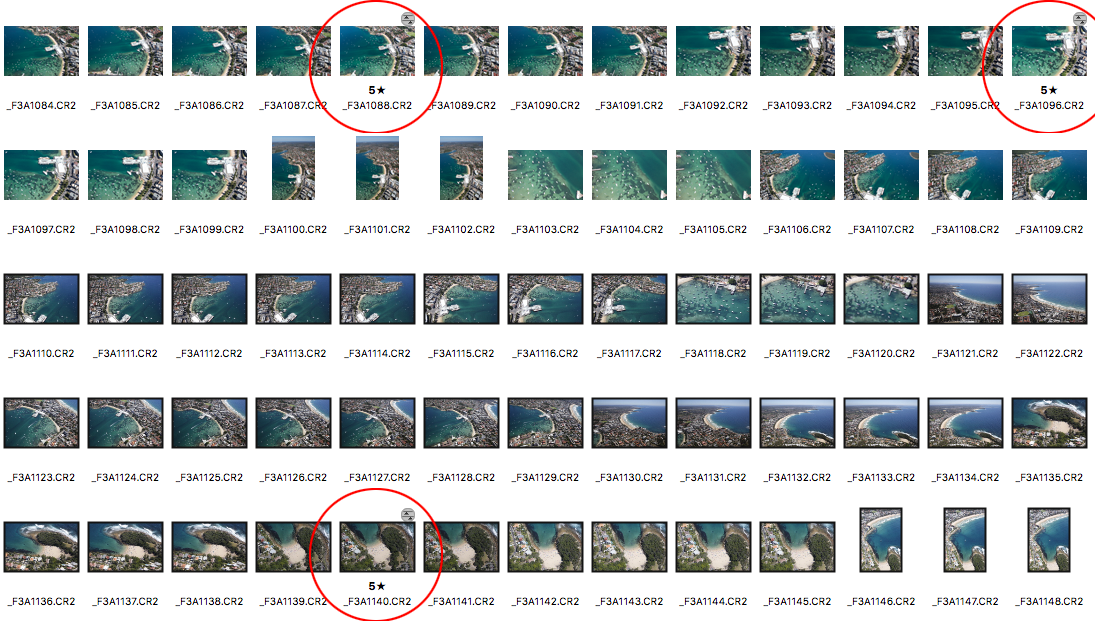
When I go through all my aerial images I click on them to just review them quickly in the preview window of Adobe Bridge, Lightroom would be even better. As I view the ones I like I give them a 4 star rating, not a 5. Once I have gone through my shoot I then refine my selection to just show me all the 4 star images from there I then cull the selection and rank the real keepers a 5 star, from here I open them and review each for sharpness, a closer inspection of composition etc. If I find that one of my 5 star images are defective I will go back to all of them and select something a few before or after just that is correct.
After this process you will have your first round of great images to process. I find that I go back to my aerial shoots even years later and find hidden gems that I overlooked the first time and I add them to my website.
EXAMINE YOUR FAILURES
Getting bad shots on your aerial shoot is just part of the process, if you have a lot of bad images then there is a lesson you need to learn somewhere in that mess of images and you need to find it and give yourself an answer, as it will be there. If you can’t find the answer then jump onto a forum or a facebook group and post your image with the settings and ask. Someone will be able to help you, don’t ever just accept what has happened without that answer.
Even if you only have a handful of bad shots, check them out and put an answer to why they are bad. This will make the next time you do an aerial shoot more productive. It always pays when doing a shoot that is very expensive to go into it aware of what can happen, what can go wrong and what you need to keep an eye on.
A few years ago I did this shoot where I knew the time I wanted to get the best light on the beaches, I booked the time for 11.30am. The company I used delayed the flight to squeeze in another customer who wanted a quick joy flight. At the time this was my third aerial flight. What ment to be a 11.30am flight turned into a 1pm take off. Now the shots I got from the flight were good, but at 1pm – 2pm the sun had moved into a position where it was now casting a shadow on the front of surf clubs and buildings along the beach, this is why I wanted the 11.30am flight time. I should have cancelled the flight due to their delay and this was my lesson I learnt after reviewing my images and seeing what I didn’t like.
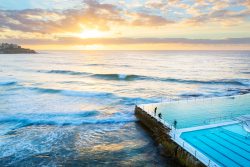
Another example is my sunrise shoot I did over the Eastern Beaches of Sydney. I deemed all my pre dawn images unusable due to the effects of high ISO noise. So next time I do a shoot like this I will have a better camera or change my start time so I arrive on scene as the sun comes up not 20 minutes before as that 20 minutes could be used to shoot other areas with shots I know I am going to keep.
MAKE NOTES
After your shoot remember it might be a good time for you to make some written notes about the flight while it’s fresh in your memory on what you would have done differently or would do next better next time. I don’t really do this with shooting with a digital camera, but when I was shooting slide film from my panoramic camera I use to come back and write down the settings I used when I was in the air, the different apertures I used on different rolls etc. So when I got my film back I could see what worked and what didn’t. I found this list not long ago and it was interesting to read what settings I used as if I was to shoot with film now from a helicopter I would have to almost go back to the beginning with making an educated guess with my settings, where if I had notes I’d just pick up from where I left off.

Well I hope you have enjoyed the series of articles where I explain from start to finish how to get the most out of your first helicopter shoot, or if your someone who has done a few them maybe you have taken something from how I go about doing things that can help you out. If you have enjoyed the articles then please share them or if you have any questions about something that has been talked about then post your comments below and I will help you out as best I can.


