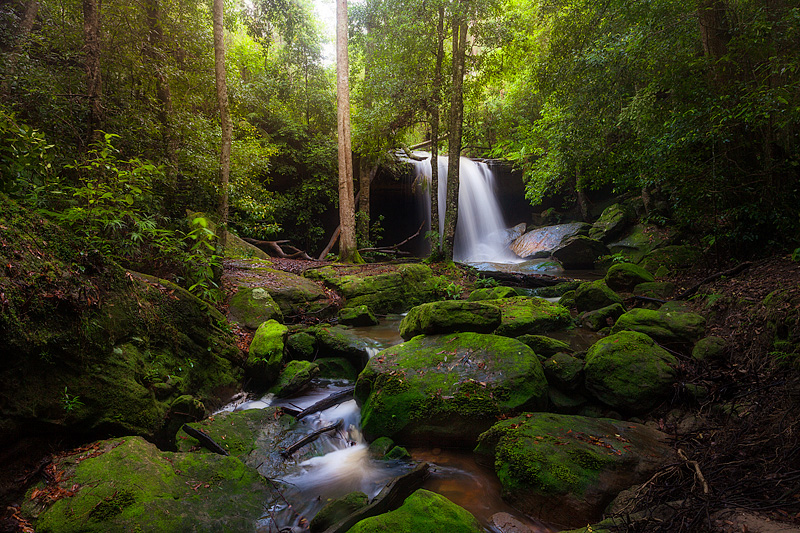
So you’re watched the weather forecast and they’ve told you your weekend forecast is overcast with a chance of showers. Now, normally, you’d think the weekend was a write off for photography, but think again. Jump online and search around for your closest waterfalls or go for a road trip. Capturing that perfect waterfall shot comes down to some creative thinging, understanding your camera and a few pieces of additional equipment. if you master these, you’ll take your waterfall shots from ordinary to extraordinary. Here I am going to talk you through some key steps and techniques that will help you get that X factor into your shots.
RIGHT GEAR FOR THE RIGHT JOB
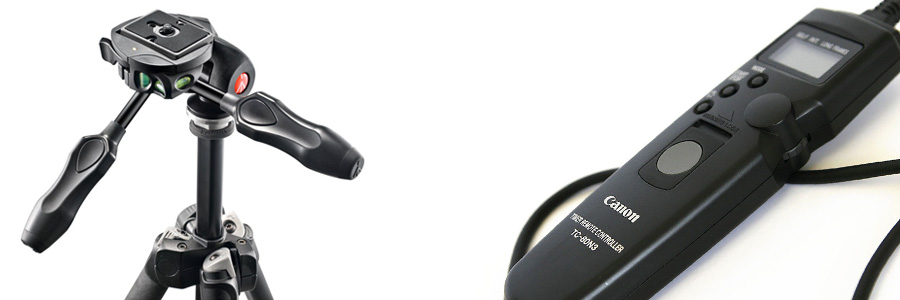
When you venture out to shoot waterfalls there are a few things you need, to make sure your trip out is a success and your images are useable and your equipment is safe.
First is a good solid tripod, it is going to really pay off in the types of conditions where you’re going to be setting up to shoot waterfalls. A light tripod with a plastic head is going to feel every vibration with the moving water and that is going to result in your shot not being sharp. Also when your shooting in these condition or anywhere you really need a tripod that can take the weight of your camera and it’s lens. It is a must.
The next thing you’re going to need is a remote shutter release. The last thing your going to want to do on exposures that are anywhere from .8 to 2 seconds is to touch your camera (no matter how careful you think you are in pushing the button… don’t, so a remote shutter release is needed. If you don’t have that then set your camera up to do a 2 second countdown and then take the shot.
A few other things that you will wish you had when it happens, is take an umbrella with you. The best times to shoot waterfalls is in overcast conditions and that can mean rain. Another handy item is a towel to wipe down your camera from excessive mist build up / over spray of water. Even have the the small towel or flannel sitting on top of your camera. Keep in mind that you will need to also wipe the front of your camera lens from water build up and droplets as this will cause unsightly defects in your image.
SHOOTING IN THE RIGHT LIGHT
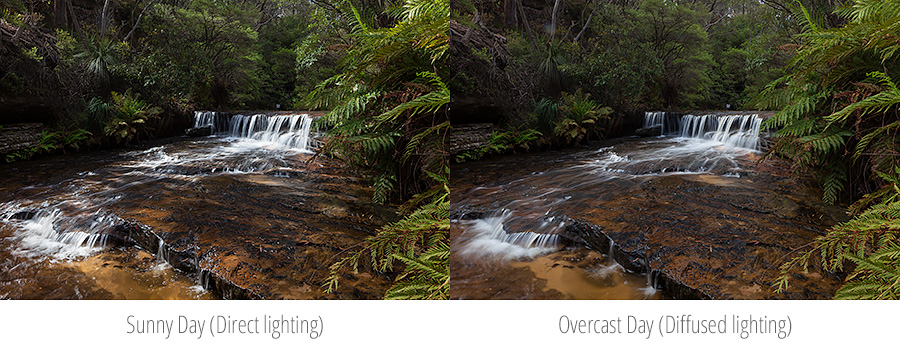
Just like shooting a sunrise or sunset you have to know what light is going to work for you and what isn’t and shooting waterfalls is no exception. As you can see in the above example of the image on the left the harsh directional light from the sun during the day is very unflattering. It creates over exposure in the moving water on the waterfall, shadow areas are deeper as you camera tries to expose for the increased light, your images instead of having even smooth lighting now has areas of hot spots of over exposure.
With the image on the right as soon as the directional light changed to diffused light everything comes back into working for you and not against you. The moving water is not over exposed and harsh, you have even lighting and the image is easy to expose for and balance. There is no comparison. So if your shooting in conditions when the sun is popping in and out then wait for it to go in and start shooting. If it looks like the sun is going to be out for a while your going to waste your time if you shoot in this kind of light.
KNOWING THE EFFECTS OF HEAVY RAINFALL
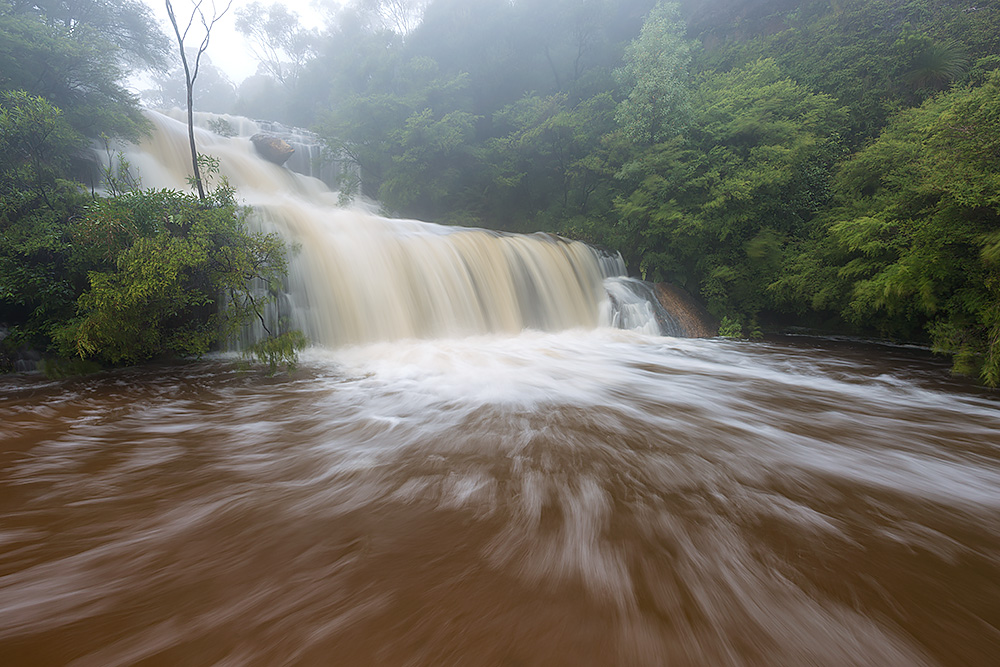
Waterfalls are just a drop in elevation for small creeks and rivers and during the year that are fed by nearly water that makes it’s way into the creek after rain or just a natural collection point for water in the area. During the year some waterfalls can turn into a trickle or stop all together. Some look great after rain, but sometimes there is rain and then there is rain. The above image was taken in March 2017 in the Blue Mountains of NSW and hour inland from Sydney after a good week of rain.
As you can see from the image there is nothing appealing about it. The water dominates and dosen’t complement the scene at all and it’s all brown. Personally for me this would be a wasted trip to just shoot waterfalls due to this problem. If your presented with something like this you can find other things to shoot in the area or maybe even take a few steps back and have something else as a feature in your images and the waterfall in the background to break up the extreme waterflow.
YOUR WATERFALL HISTOGRAM
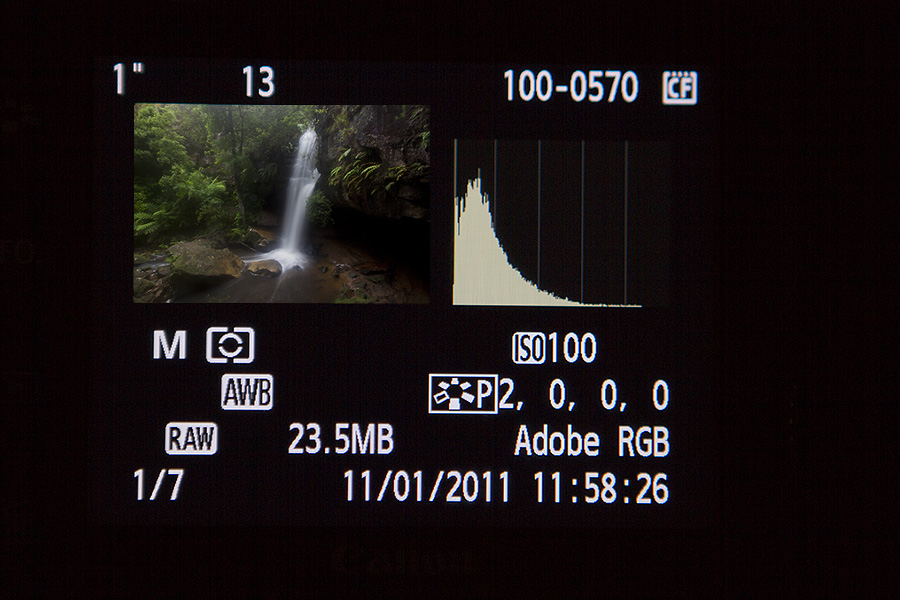
Understanding your histogram is detailed will take time but, like any kind of lighting environment, there’s a basic histogram that you want to aim to achieve and control. Terms like “Exposing to the Right” can be confusing and ambiguous and when shooting waterfalls it comes down to “what goes right” and should anything go right at all.
So what are you looking for ? Well if you’re shooting a waterfall, you’re going to keep the sky out of your shot as best you can to eliminate over exposed areas in your image unless it complements your shot and you can do something like exposure blend.
When you take a shot (even if it isn’t correctly exposed) the brightest part is going to be on the far right and will usually be the white of the falling water. On your histogram this might be indicated by only a few pixels in height, so don’t go looking for any tall peaks. The peaks on your histogram represent how many pixels have that same value. Your waterfall histogram will usually look like a ski ramp, with the image favouring the far left where the low light / shadows tend to live and set up camp.
After you’ve taken your first shot, walk your exposure up in 1/3rd stop increments (Not sure what a stop is, then check out our article on “What is a Stop“). (Your camera by default should be set up in 1/3rd increments, which means one click on your dial will add 1/3rd exposure to your shots.) If your camera isn’t set up to do this then you might want to check out this article on “Setting up your digital camera correctly the first time.”
What you’re looking for when walking your exposure up in 1/3rd stop increments is to hit the “clipping point” of the exposure where the highlights push past their capture range and they will display on your screen and blink. Once you have found this point in your exposure dial your exposure back 1/3rd of a stop and this is the place you need to be to shoot your waterfall as a single shot.
By pushing your histogram this far, you’re adding as much exposure information brightness into the shadow areas which means when it comes to process your images in Camera RAW you have a better chance of getting clean detail in those darker areas.
Always remember that the histogram is the truth of what your image will be not the LCD screen on the back. If your LCD screen looks great, it doesn’t mean that when you get home your image will be great. So it pays to understand the relationship your camera has between your histogram and what you see on the LCD screen and your monitor at home. This is worth investing time into.
USING A POLARISING FILTER
There was a time when I use to say that if you didn’t have a polariser and were planning on shooting waterfalls that you were wasting your time, but this is kind of harsh. But I believe that if your shooting waterfalls that using a polariser is an essential piece of equipment if you want to get the best possible results.
When shooting waters falls your polariser will do a few things for you. First of all due to the nature of the polarisers tinting when you add it to your lens you will need to adjust your exposure by approximaetly 1 to 1 1/3rd stops of extra shutter speed to your exposure which is great when you want to achieve those slower shutter speeds for water movement. Your polariser is going to remove glare on your vegetation and especially the rocks giving them a nice even looking exposure. Your polariser is also going to give you whole scene a hit of extra saturation and vibrance, this will be more so if your using something like the Tiffen Warming Polariser that has a warming tint to it.
For more details about shooting with your Polariser I have an article “Your polarising filter – how and when to use it“.
PICKING THE RIGHT SHUTTER SPEED
Personally for me my ideal look for waterfalls is that movement where the water in places is white but you still have areas where there is detail. From experience out shooting this is achieved with exposures anywhere from .8 to 2 seconds in speed and this is the shutter speed that I will get when shooting. This might change due to the speed of water movement, the amount of water etc. But generally this is a great place to start.
To achieve these kinds of shutter speeds it is much easier in overcast light and using a polariser as mentioned above as it will drop your shutter speed 1 and a 1/3rd stops. If you’re still finding it hard to get to your desired speeds drop your ISO to 50 (Marked as L on some cameras). Next you need to turn to your aperture. You should be shooting at f11 anway and drop your aperture down in 1/3rd increments as needed. By now you should be easly getting a shutter speed as slow as 2 seconds if not slower.

